With Fusebase MCP, you can use agents to work with Fusebase databases: specifically, you can create new databases and connect to existing ones with Read Only and/or Edit permissions.
Here you can find more information about databases: https://thefusebase.com/guides/table-database/
And here you can read about MCP: https://thefusebase.com/guides/fusebase-ai/expanding-ai-agent-functionality-via-mcp/
With Fusebase MCP, you will be able to:
- create new databases and tables with the required columns and content;
- edit existing tables: add new rows, columns, etc.;
- obtain read-only access. For example, agents will be able to search the contents of your databases; and more.
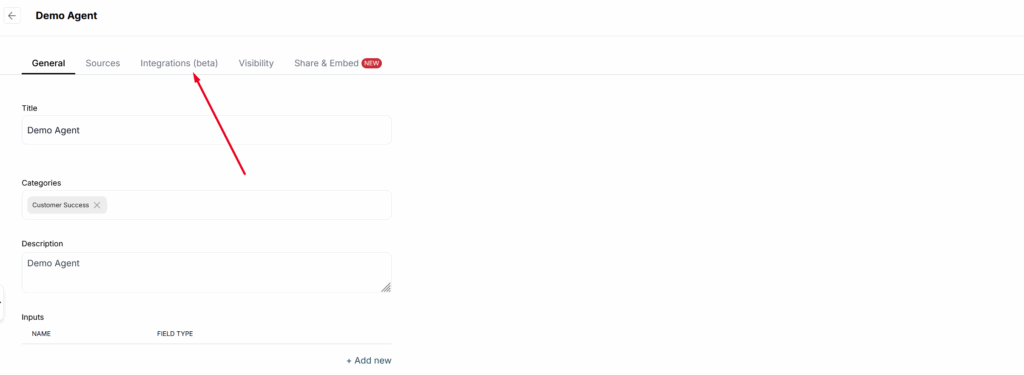
Connecting Fusebase MCP to an agent
1) Create a new agent or go to the settings of an existing one.
2) Navigate to the Integrations section.
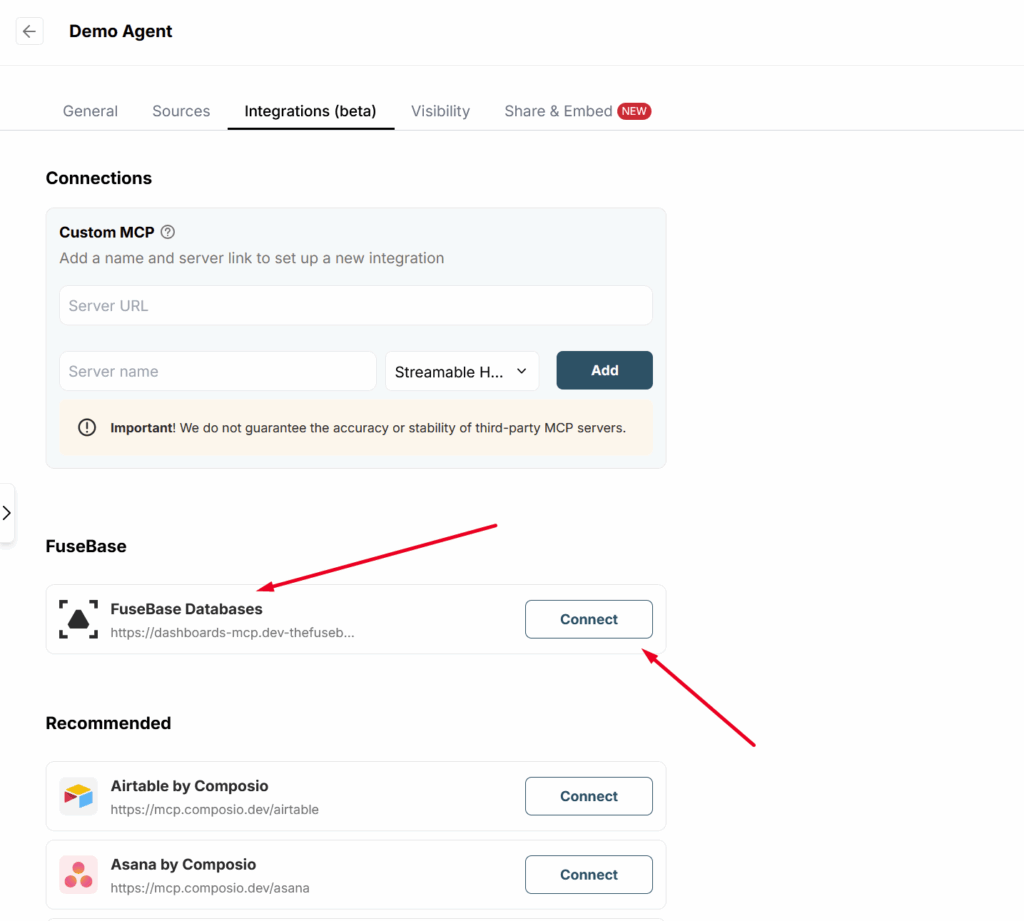
3) Find Fusebase in the list and click Connect.
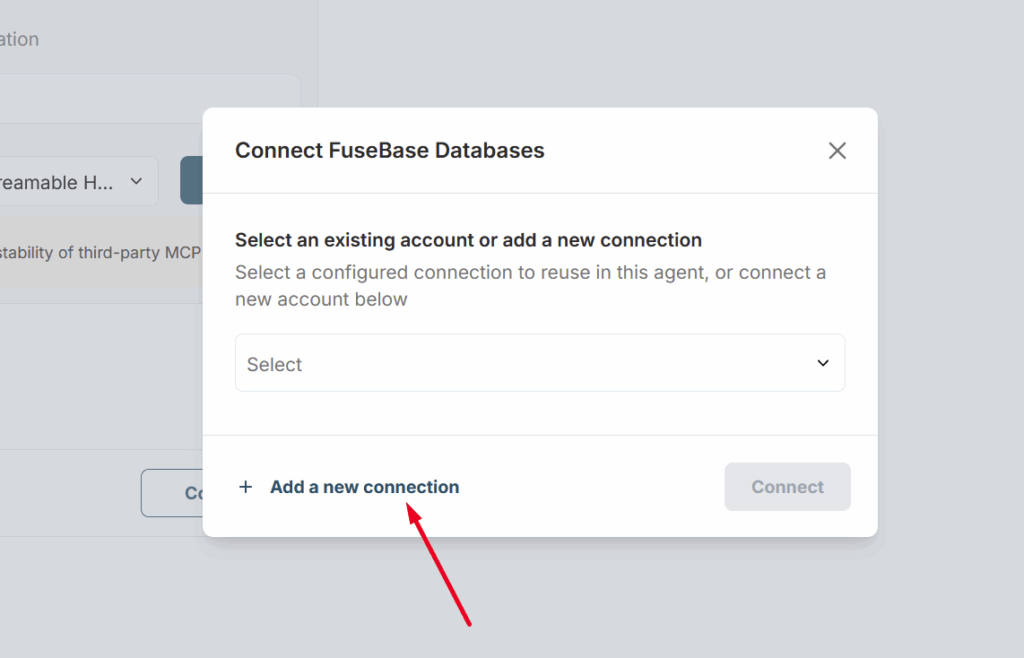
4) Click on Add new connection.
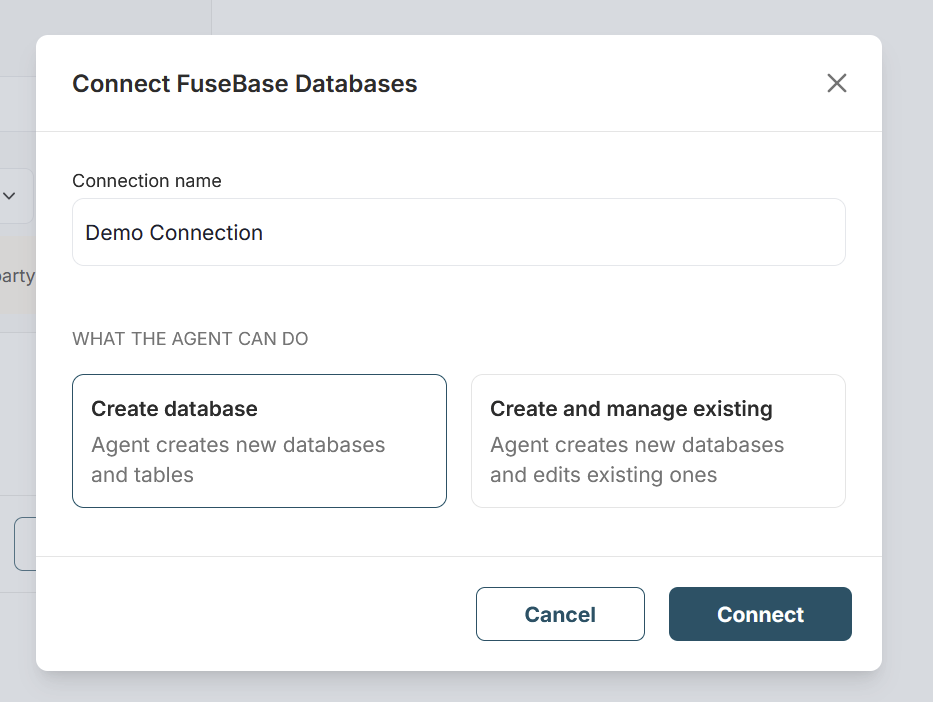
5) Next, you need to specify what the agent can do within this connection.
Create database – the agent can create a database and populate it with the data you provide. This is an excellent option for creating databases based on templates or, for example, migrating a database from another service. Important! The agent will not have access to any other databases except the one it has created.
Create and manage existing – the agent will be able to access existing databases, with the option to edit them or have Read Only access. If you grant Edit permission, the agent will also be able to create new databases.
6) If you select Create database, click Connect and the connection will be linked to your agent. If you select Create and manage existing, you will need to choose the databases the agent will have access to. You can select one or multiple databases.
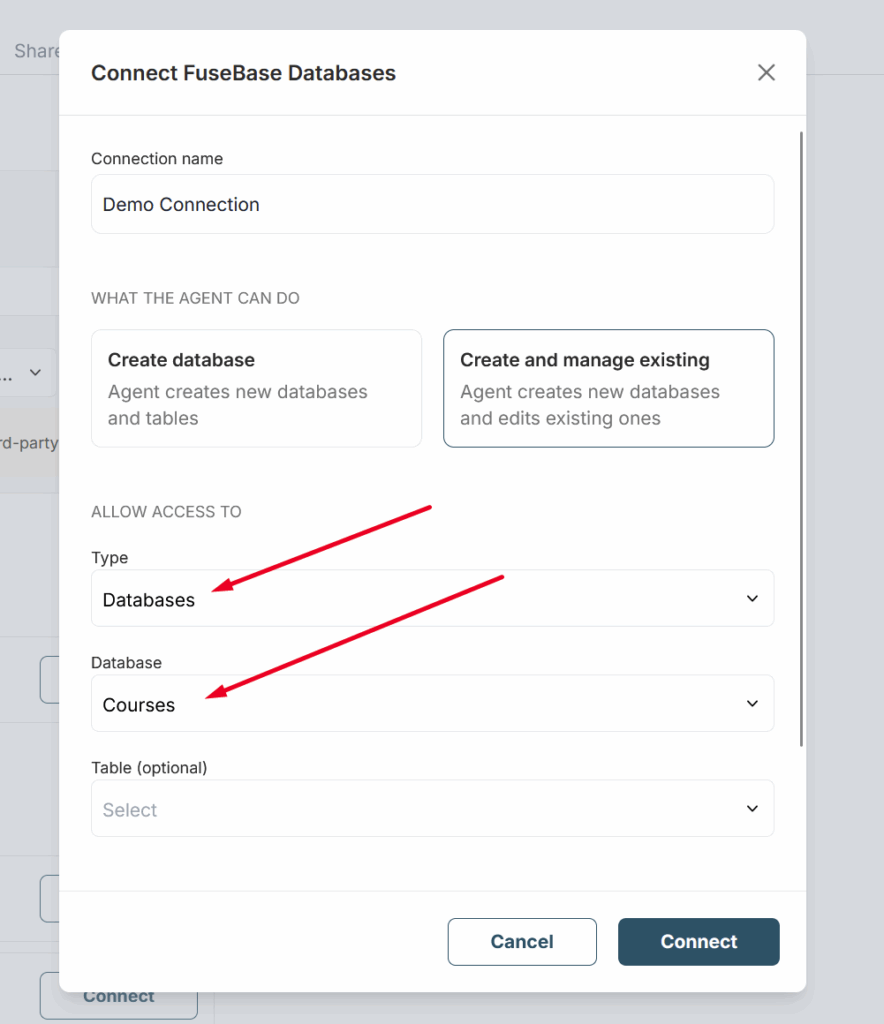
7) Next, select the permissions the agent will have for your databases.
Read – read-only access (for example, if you are creating a chatbot based on the table’s content).
Read and Write – allows editing tables, including adding columns and rows, as well as creating new databases and tables.
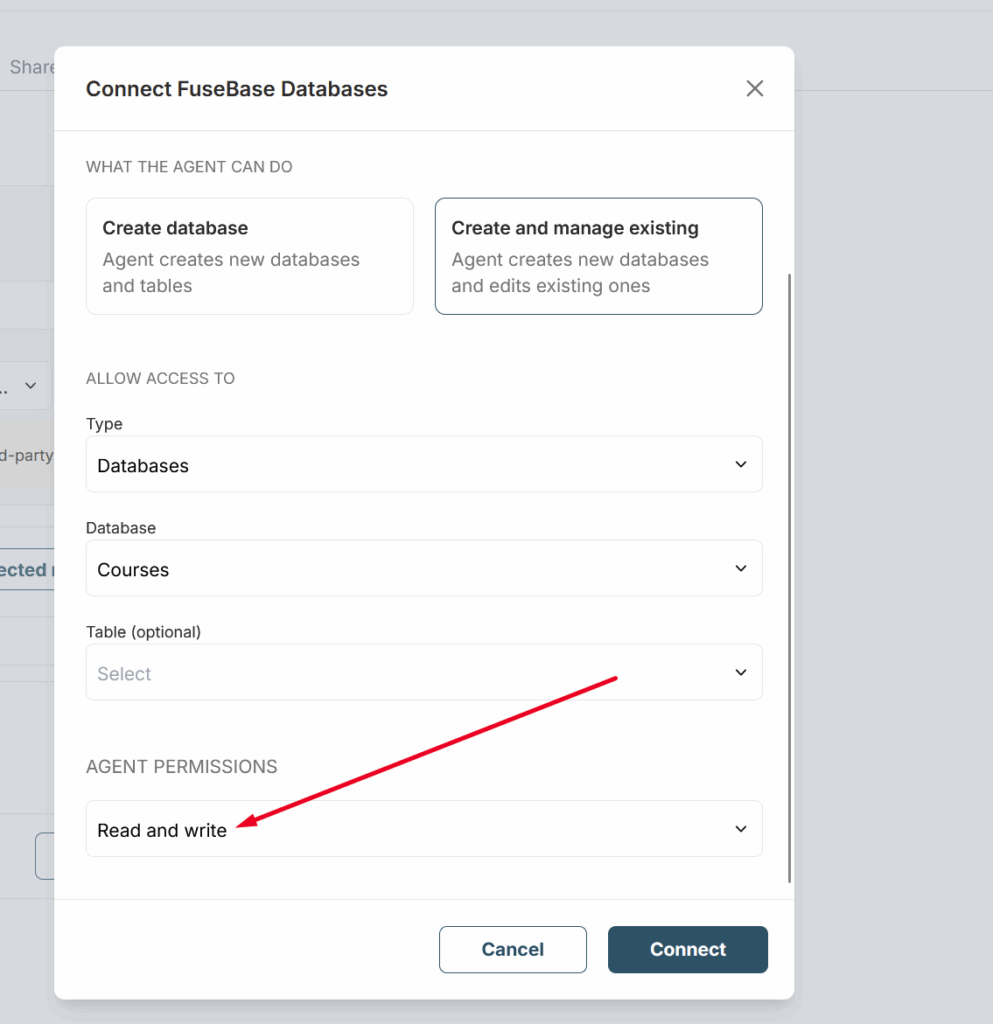
8) Next, click Connect to link the connection to your agent. It’s important to note that you can create different connections for different agents. For example, you can create one agent that can only create databases, and another agent that can read specific databases, and so on.