Portals
Custom Domain Name with FuseBase Portal
If you want to use your own domain name, and you have access to your registrar's dashboard / DNS control panel, you can easily connect your custom URL to the portal.
Guide details
- Published
- September 20, 2022
- Read time
- 3 min read
- Category
- Portals
Before setting the portal with Custom Domain, you need to configure the Custom Domain for your organization. You can find more information in our guides: https://thefusebase.com/guides/
If you want to use your own domain name, and you have access to your registrar’s dashboard / DNS control panel, you can easily connect your custom URL to the portal. In order to do so, please follow these steps:
1. Click on the icon + and choose “New Portal” and the workspace you need.
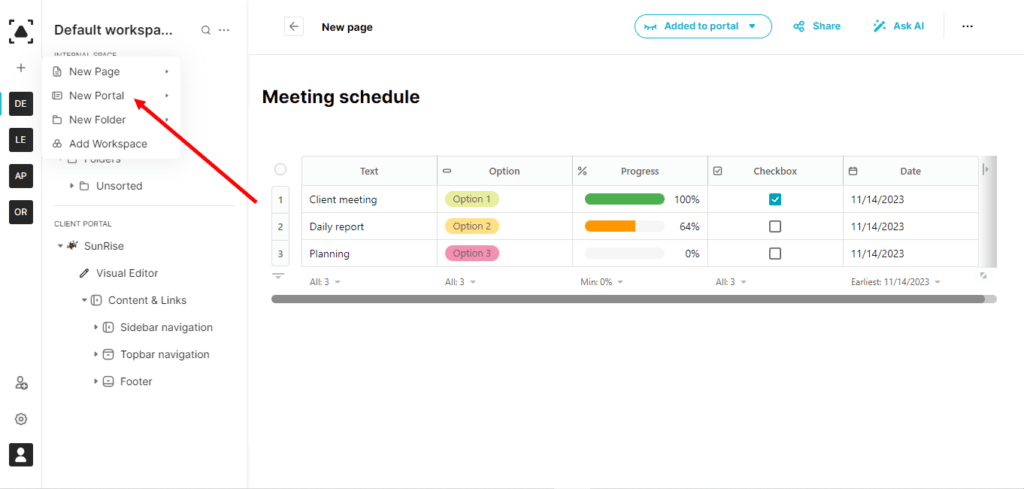
2. The window with the wizard will appear.
3. Enter the title of your portal and the domain you want to use as in the example below. It may be any valid FQDN.
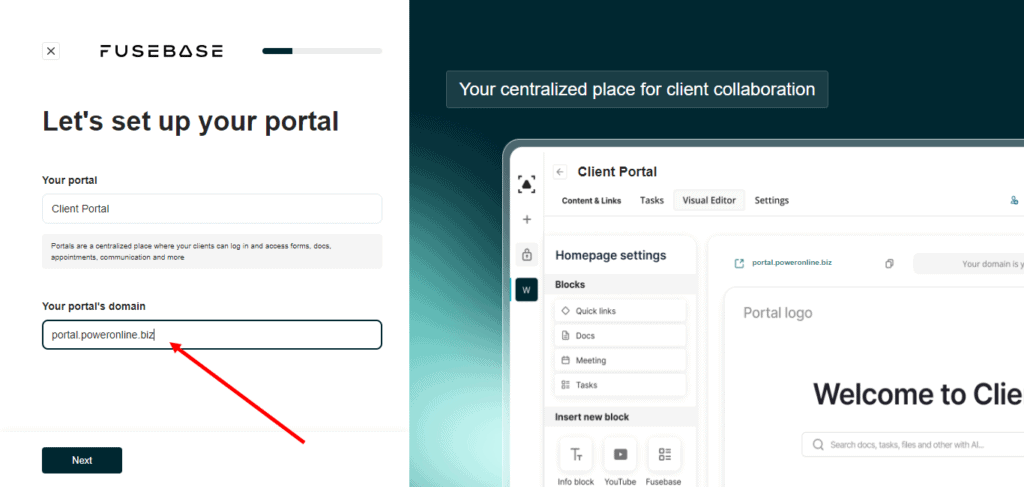
4. Complete the wizard and you will be redirected to the Buider Console. You can find more information how to complete the Wizard here.
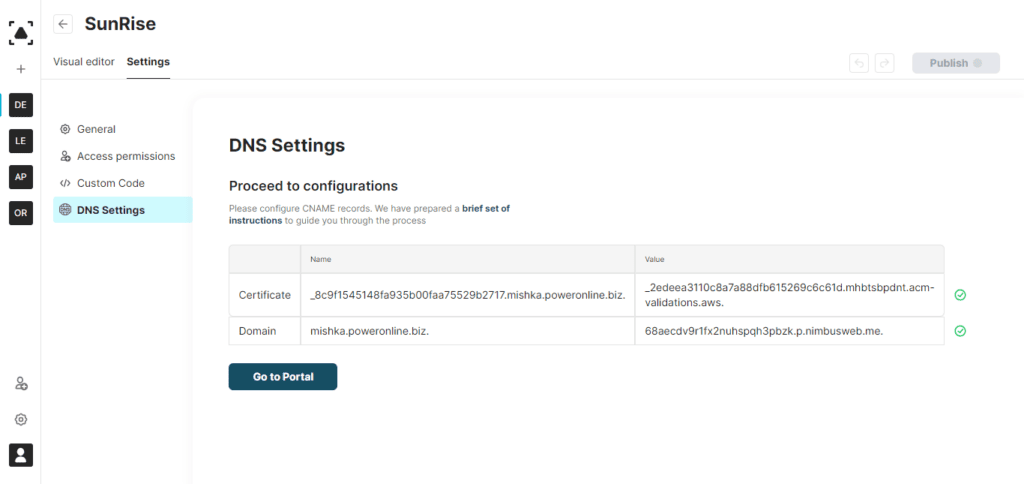
5. Here you can see the message, click on the “Activate Cname” and the window with the DNS settings will be opened.
6. Login into your domain’s registrar control panel.
7. Go to Domain List → click on your-company-name.com → click on DNS Zone Settings
8. Click on Add New DNS Record link and Choose the type CNAME.
9. In the dialogue Proceed to configurations copy the Name and Value.
10. Paste it to the value in your domain’s registrar control panel. TTL has to be a default value
11. Once done, click on the Save button. The first CNAME record is successfully created.
12. Follow the same steps with the second CNAME record in the dialogue
I want to create many portals, and do I need to manually set up CNAME for each one? This is time-consuming and complicated!
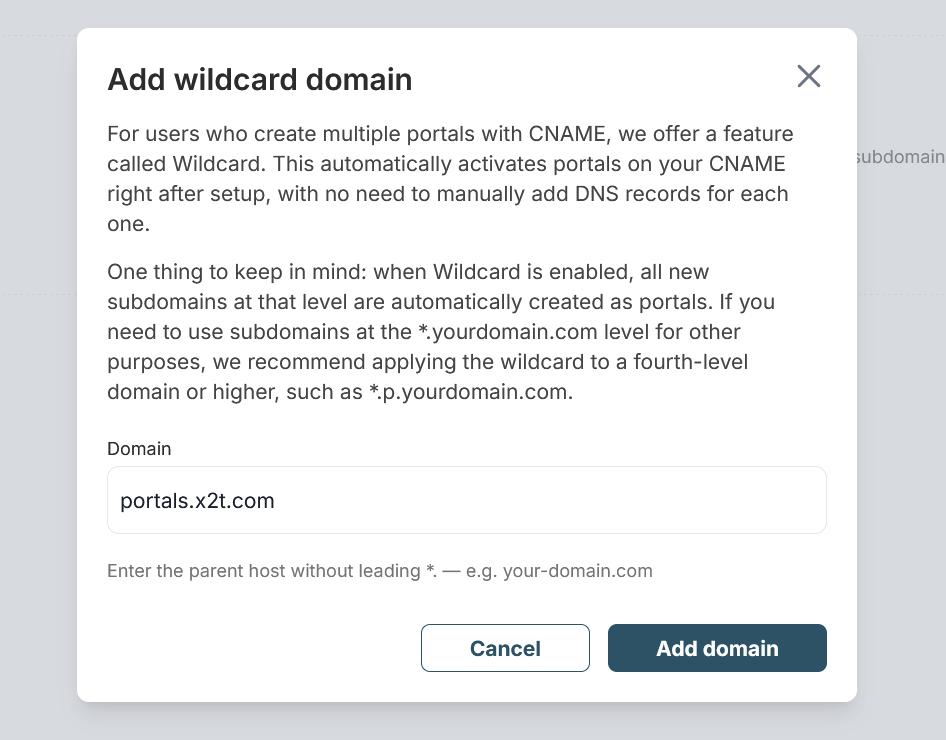
For users who create multiple portals using CNAME, we offer a feature called Wild Card. This allows automatic activation of portals on CNAME immediately after setup, without the need to manually add DNS records. However, it is important to note that in this case, all new subdomains at this level are automatically created as portals. Therefore, if you need to use subdomains at the *.yourdomain.com level for purposes other than portals, we recommend applying the wildcard to the 4th-level domain or higher, such as *.p.yourdomain.com.
How do I activate Wild Card?
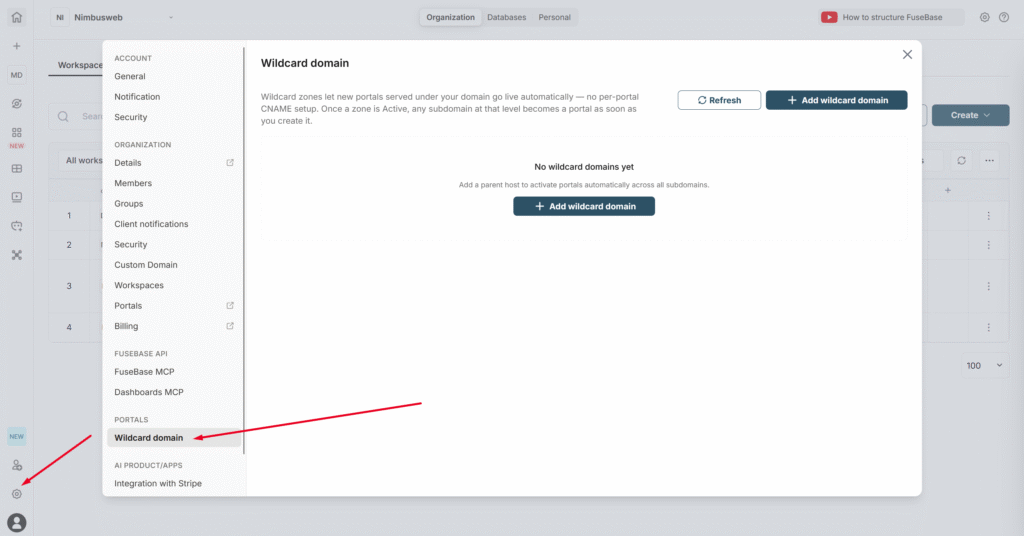
1) Go to your organization settings and click on Wildcard domain –
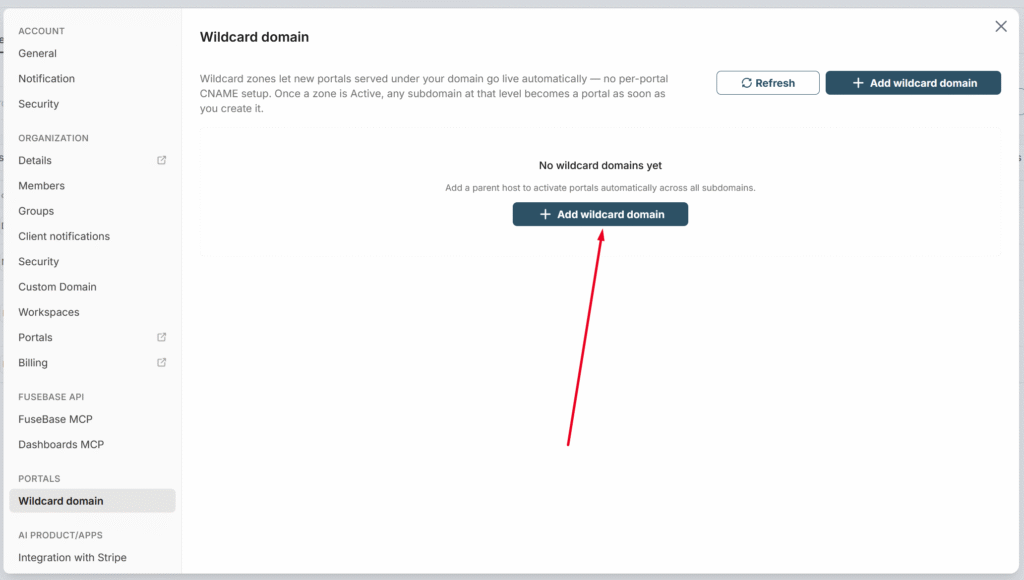
2) Next, click on Add wildcard domain –
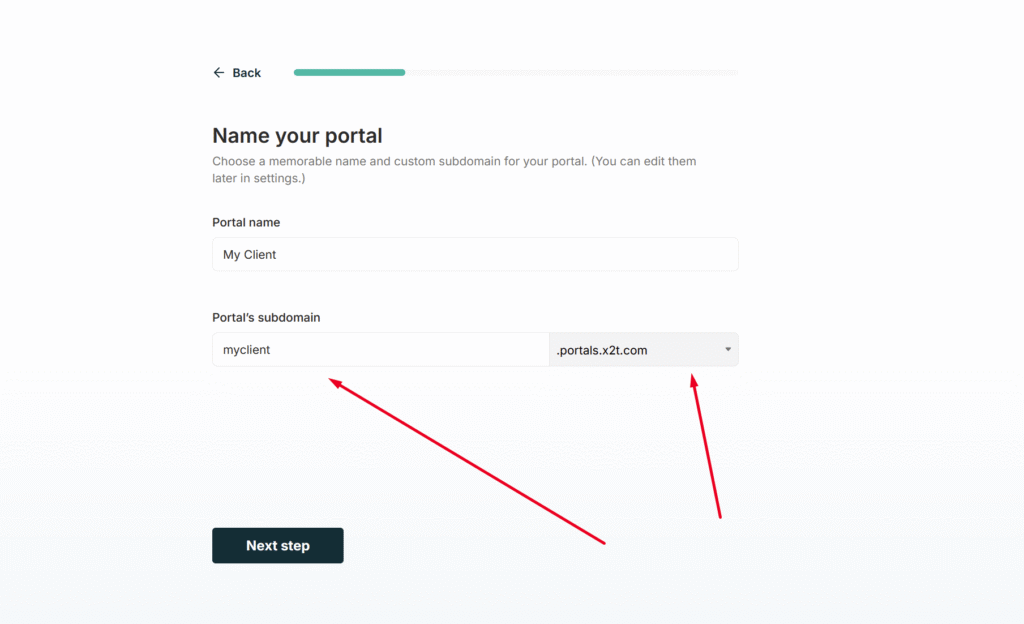
3) Next, specify the domain or subdomain for the portals. For example, if you want the portals to be in the format clients.portals.x2t.com, you should add portals.x2t.com.
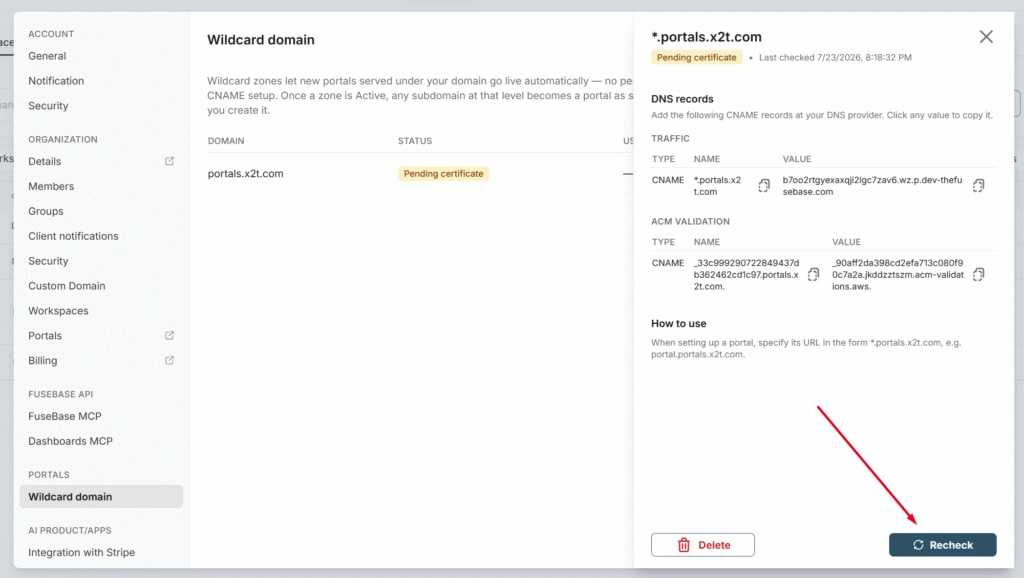
4) Next, you need to copy and add the CNAME records to your domain registrar or hosting provider.
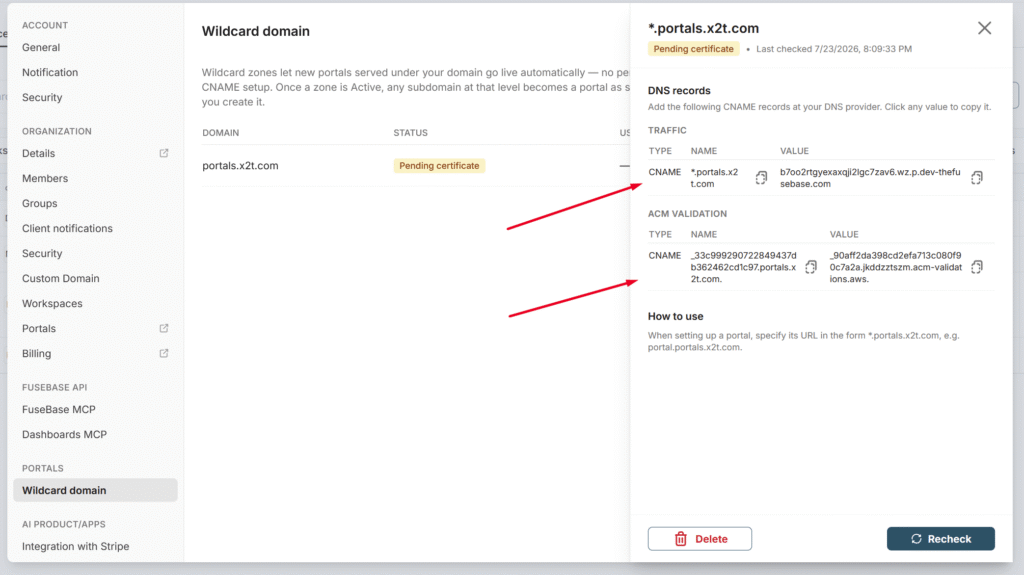
5) After adding the records, you need to wait for them to be activated. From time to time, you can click on Recheck to verify the activation status.
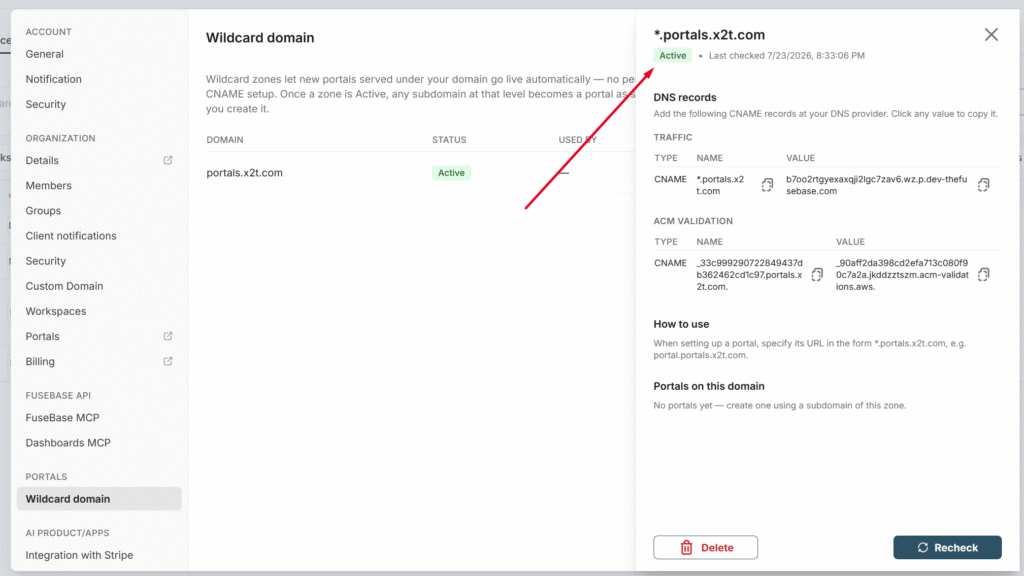
After successful activation, the status will change to Active.
Next, when creating a portal, simply select the desired Wild Card domain and specify the subdomain. After the portal is created, the subdomain will be activated automatically.