FuseBase AI Apps removes all limitations on expanding functionality. Don’t like the current look of the tables? Create your own as you wish. Need a specific dashboard? Build it yourself. Looking for a ticketing system or onboarding process? No problem – just 10 minutes and it’s ready.
A couple of prompts, 10–15 minutes of waiting, and the functionality you need is ready for use.
Want to use AI apps outside of FuseBase? No problem – just make the app public and share the link with your clients and partners.
To start, here is a short video that provides an overview of how FuseBase AI apps work and how to create them –
Now let’s take a closer look at the structure of apps and how to start implementing them.
What are Product (and why they matter) #
An Product in FuseBase is a complete solution that runs on top of your FuseBase infrastructure (databases, permissions, etc).
Think of an Product as a packaged product you can generate, configure, share, and reuse – without shipping one-off features inside the core product every time users ask for something new.
Why Products exist #
Products let you:
- Ship faster: generate a working solution in minutes, not weeks.
- Avoid product bloat: instead of adding every requested feature to the core product, you generate purpose-built apps.
- Stay consistent & secure: apps inherit the same backend primitives—access control, auditability, data model.
- Scale through distribution: apps can be shared, cloned, sold, and installed by others (marketplace/resellers/agencies).
What are Apps (and why they matter) #
A App is a building block inside an Product.
Why Apps exist #
Apps let you:
- Compose apps instead of hardcoding: apps become modular, not monolithic.
- Toggle and tailor: turn features on/off depending on the customer’s workflow.
- Reuse across apps: the same “Approvals” feature can power Requests, Ticket System, Legal Intake, Real Estate transactions, etc.
- Upgrade safely: features can version independently and evolve without breaking the entire app.
Common Apps types #
- Collection features: forms, file requests, confirmations
- Workflow features: approvals, SLAs, escalations
- Views: kanban, dashboards, filtered lists, reports
- Automation/agent features: parsing, enrichment, follow-up drafting, routing logic
- Portal features: client-facing upload, status page, downloads, Q&A
What can and cannot be done in the current version of Vibe Coding #
At the moment, our Vibe Coding module is designed for creating frontend apps with a simple backend based on our databases. For more details about our databases, please refer to: https://thefusebase.com/guides/table-database/
The apps you create can both save data to the databases and retrieve data from them (i.e., the database can serve as a data source).
Examples of apps you can create include: portals, landing pages, form generators and onboarding flows (with the ability to view results), dashboards and reports, additional views for tables, and more.
In upcoming CLI versions, more features will be added, including working with portals, Email API, automations, and more. Full backend capabilities will also be introduced, enabling more complex integrations and allowing you to build more advanced apps.
Let’s create our first product and app #
Step 1. Download and install the CLI, which will help us work magic #
To create products in FuseBase, you need to download our CLI (command line interface). CLI is a plugin that can be installed as part of your favorite IDE (Integrated Development Environment). You can use our CLI in the most popular IDEs currently available:
- VS Code
- Cursor
- Claude Code
- OpenCode
- Codex
- Antigravity and others
Of course, we are not planning to limit ourselves to just the CLI. We will soon be launching a web version and a standalone desktop application.
You can download the CLI using this link – https://ai-dev.thefusebase.com/how-it-works
This page also outlines the key steps you need for a quick start. Once you have downloaded it, launch the installer and wait for the installation to complete.
Step 2. Log in to FuseBase #
1) Next, open your favorite IDE (for example, Cursor or Claude Code) and go to the terminal.
We recommend creating a separate folder or project for each app.
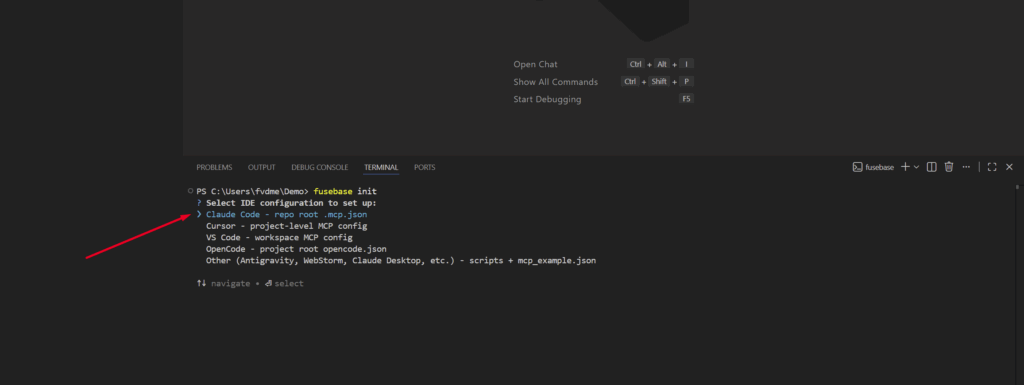
2) In the terminal, enter fusebase init. First, you will need to log in to FuseBase. A browser window will open automatically for authorization. You will only need to authorize once.
Step 3. Creating an product in FuseBase #
Next, select your IDE (for example, Claude Code) and the organization where the app will be created.
Next, specify the name of the product and its subdomain. For example, if you are creating a ticketing system, enter “Tickets” as the name and “tickets” as the subdomain. Accordingly, the app URL will be tickets.thefusebase.app.
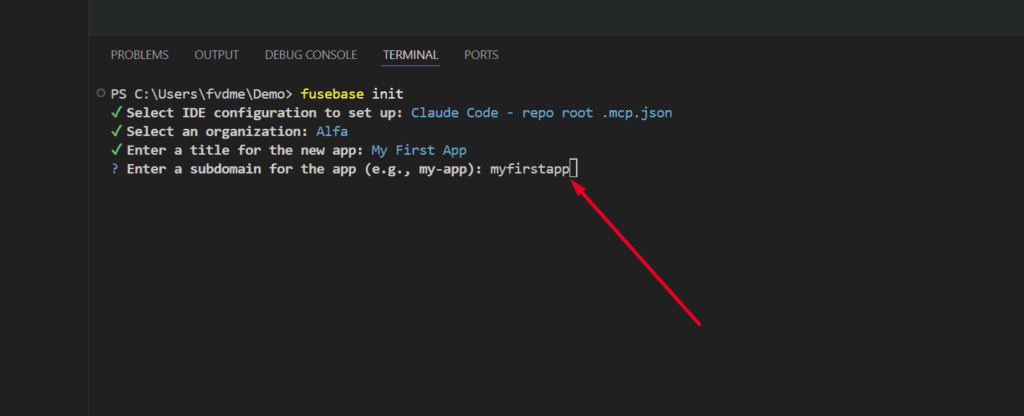
That’s it – you can now start creating your own products in FuseBase.
Step 4. Creating a App #
Next, you can create the app or apps you need. To do this, you can use any AI chat tool in your IDE, such as Claude Code, Copilot, and others. Simply describe what you need.
For example, simply write something like:
I need a ticketing system that includes an admin side for managing tickets and a client side where clients can create tickets. Create a new database for the ticketing system. Only organization managers will have access to the admin section, while clients will have access to the client section.
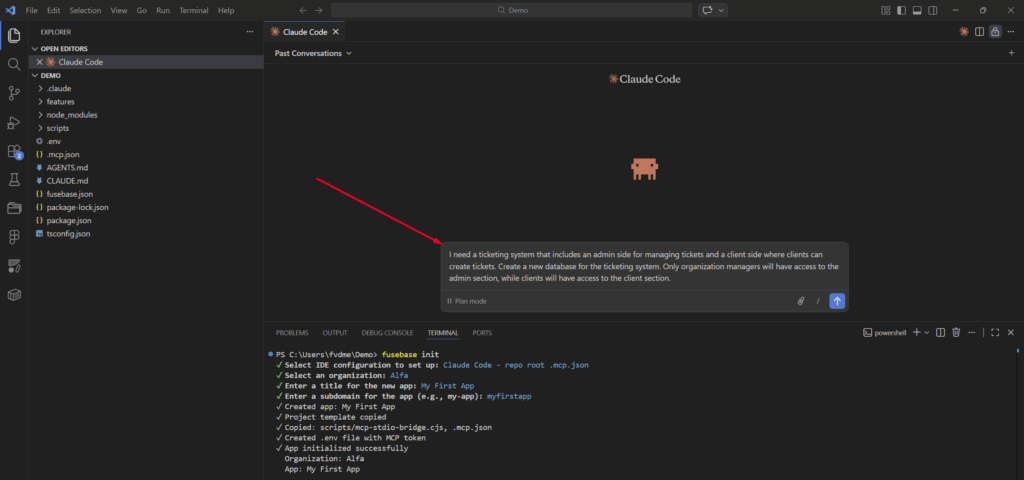
Next, the AI will begin creating the feature. If necessary, please answer any questions that may arise during the process.
Step 5. App Testing #
After the AI implements the feature, you can test it locally. This can be done easily by entering “Open dev server” or “Open local server”.
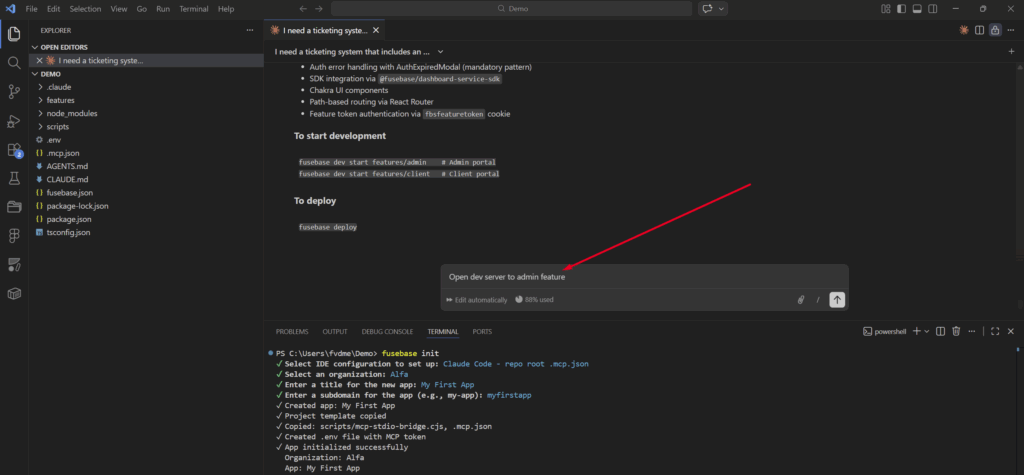
Next, your browser will open, where you can test the functionality that has been implemented.
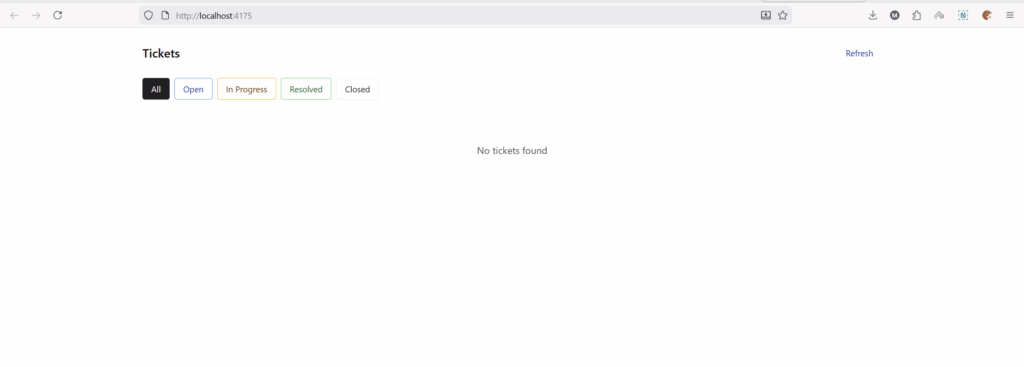
If something isn’t working or you’re not satisfied with a certain aspect, you can immediately mention it in the chat. The AI will fix the issue or make improvements.
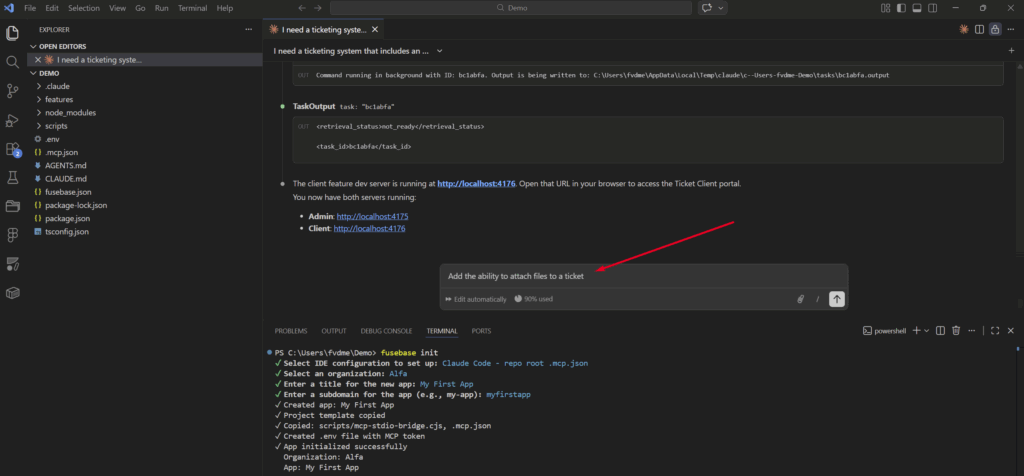
Step 6. App Publishing #
If you are satisfied with the results, you can submit the feature and its changes to FuseBase. To do this, simply type deploy or publish in the chat.
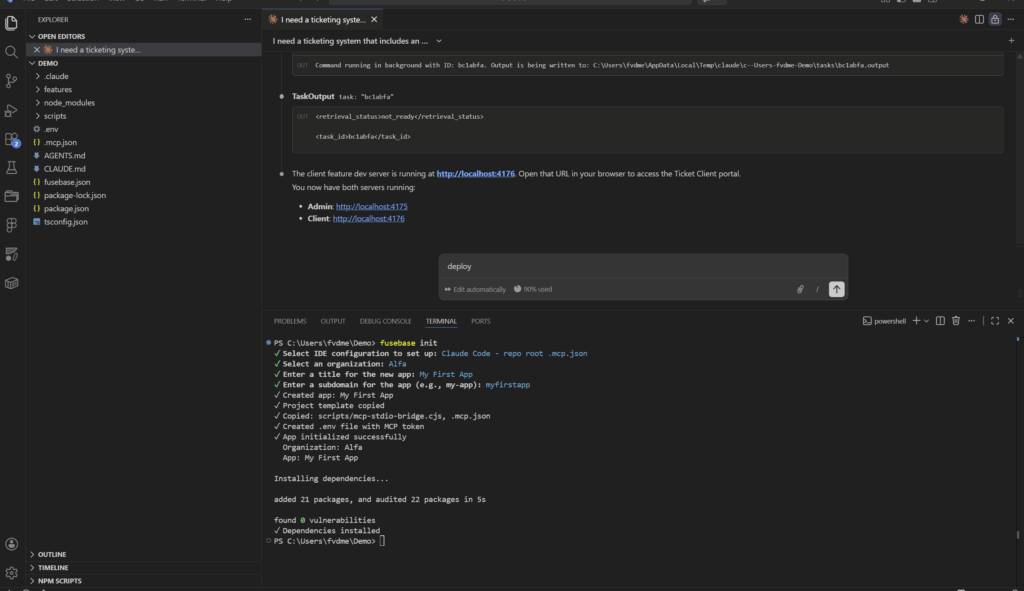
After a successful deployment, you will see links to the apps. By following these links, you can view your apps.
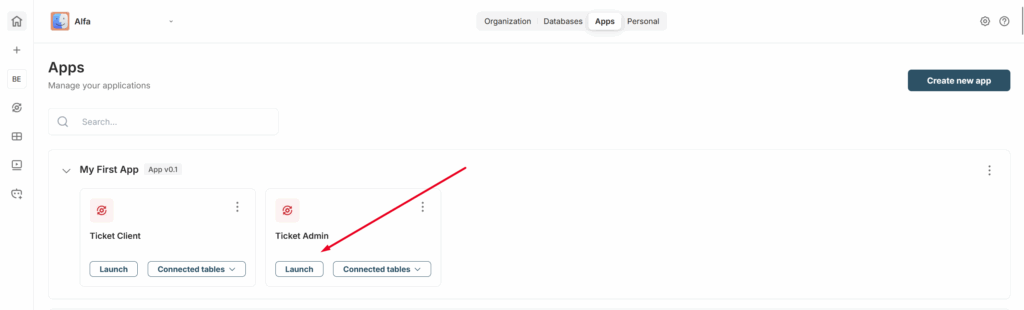
You can also view your products and apps in the Products section. By clicking Launch, you can start them.
Step 7. Sharing Products and Apps #
In FuseBase, you can create apps that are either internal or public. Internal features can be used within your organization and are accessible only to organization members.
Public apps are accessible to anyone who knows the feature URL, including anonymous visitors.
Within a single product, you can use both public and private apps simultaneously. For example, if you are generating forms, the builder and the results viewer can be internal app, while the forms themselves can be public apps available to all visitors.
You can make a app public or private during its implementation—just specify in the prompt, for example: “I want this functionality to be available to everyone.”
You can also change a app to public or private after implementation through the Products section.
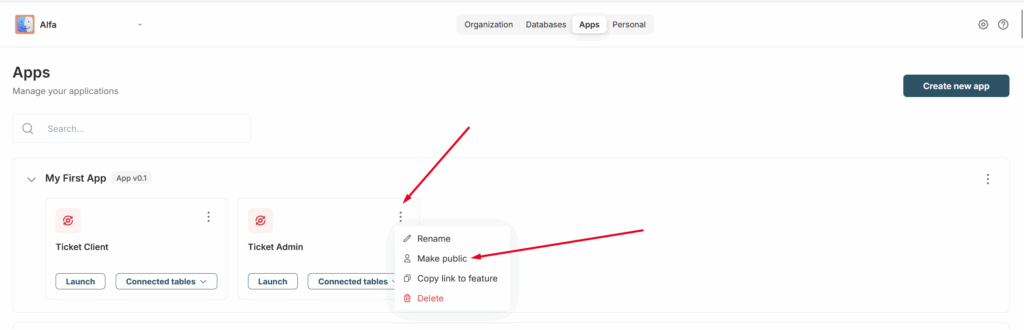
Products Section #
In the Products section, you can view all the products and apps implemented by you and your team.
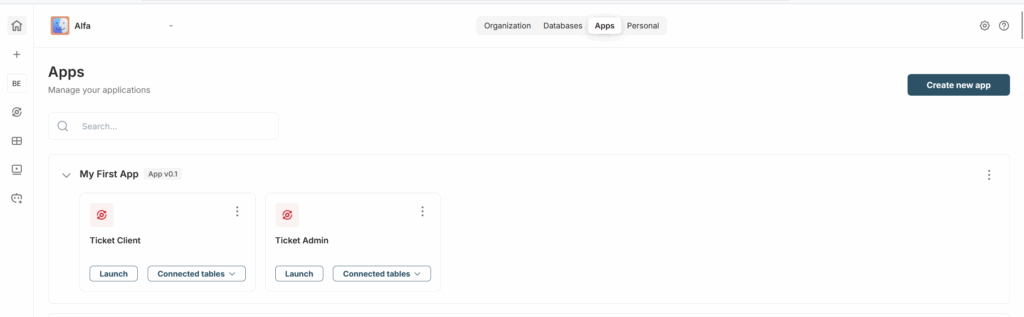
Here you can:
1) Launch apps
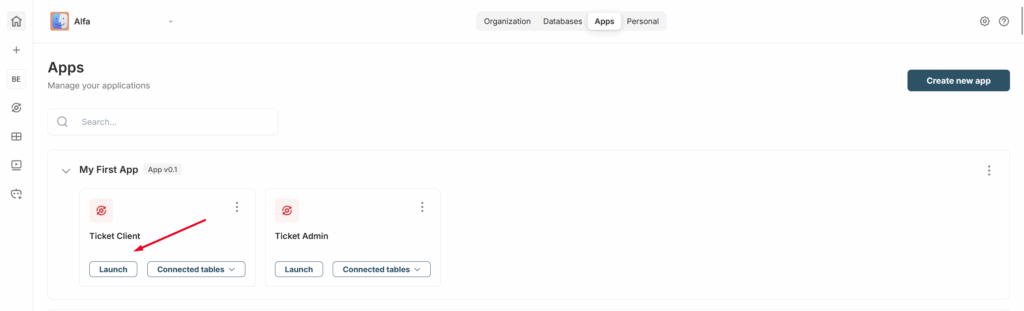
2) View the databases/tables used by the apps
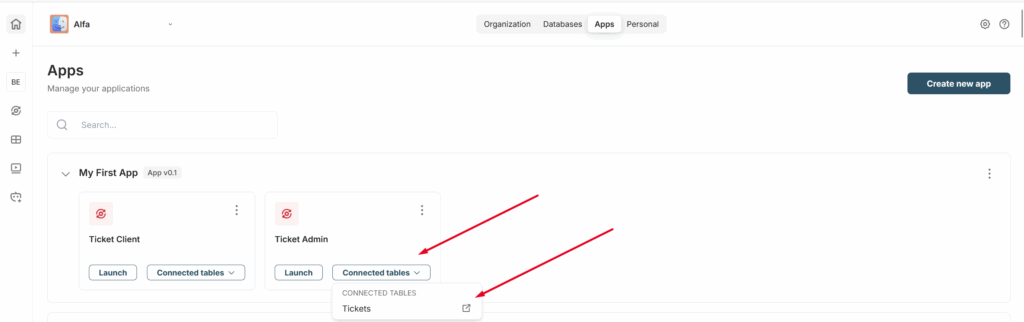
3) Make a feature private or public
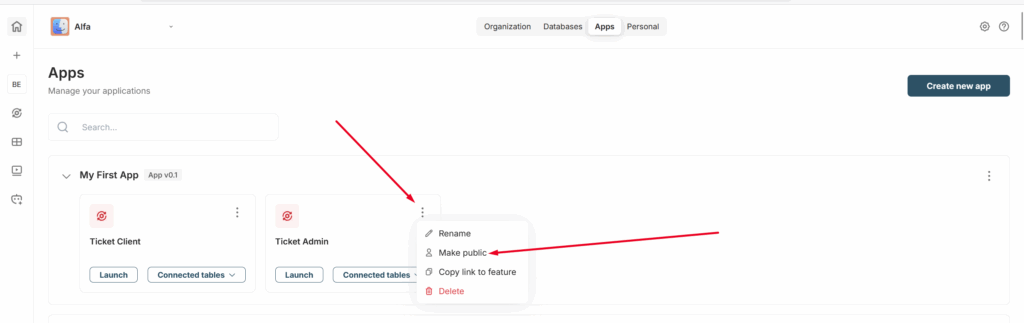
4) Copy the link to a app
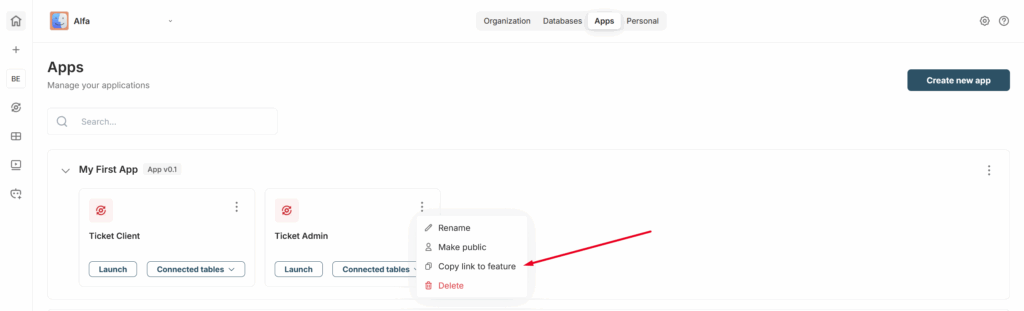
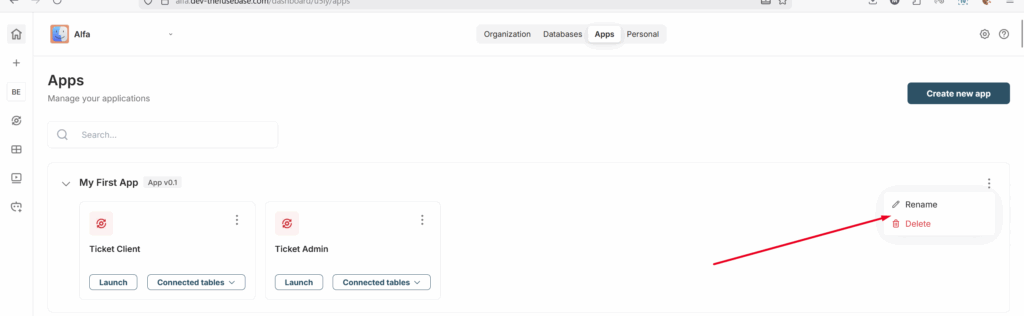
5) Rename or Delete an product with its apps or just a specific app –
Best Practices & FAQ #
Do I need to know programming to create products? #
No! You just need to install any popular IDE (for example, Cursor) and FuseBase CLI. It’s very simple and does not require technical skills. Then, you simply specify the type of product you need (for example, a ticketing system or file manager), and the AI agents will handle everything for you.
Is it possible to grant access to a app to specific roles? #
Absolutely! For example, consider a ticketing system where there is a ticket management feature and a client-facing feature – creating and viewing tickets. Access to ticket management can be granted only to organization managers, while ticket creation can be available to any members and clients.
This is done using standard prompts. When creating a feature, simply instruct the agent: “Only organization managers can access this feature,” or, for example, “All members except clients can access this feature,” and so on.
You can read more about roles here: https://thefusebase.com/guides/getting-started/key-role-differences/
Do I need to install anything else besides the CLI? #
No, there is nothing else you need to install besides the CLI. All essential components, including core packages like NodeJS, are already included. If your product requires any additional libraries, the AI agent will prompt you to install them, and you will just need to confirm.
Detailed Functional Description #
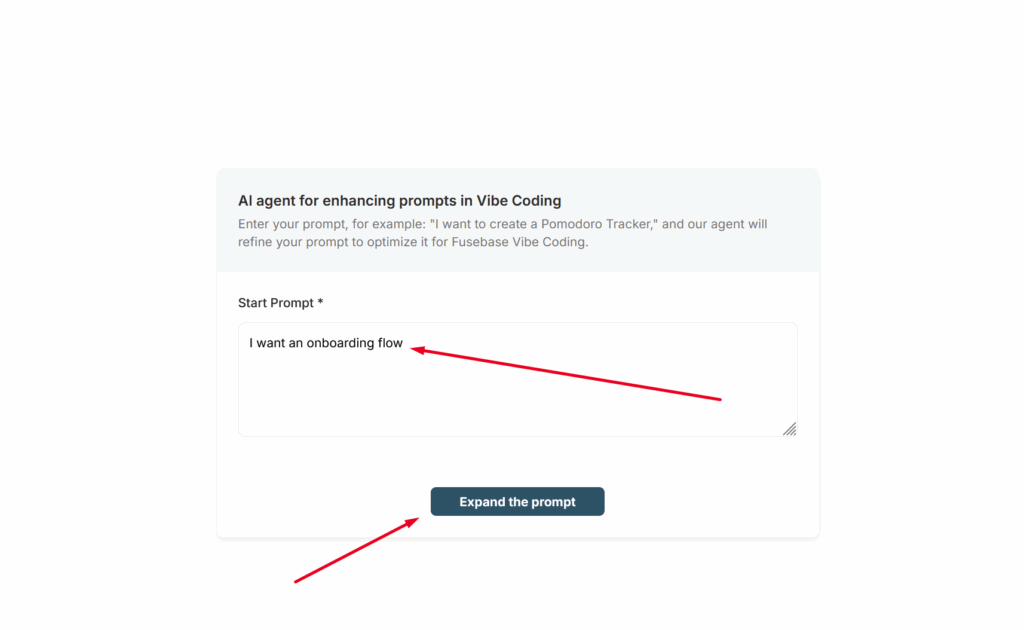
For the AI, it is important to provide as detailed a description of the functionality you want as possible. Yes, you can simply write something like “I want a CRM” or “I want an onboarding flow” and the AI will create such functionality, but the result may not fully meet your expectations the first time.
To save you from having to write everything yourself, we have created a special agent called AI agent for enhancing prompts in Vibe Coding (you can find it in your list of agents).
With this agent, you simply describe what you need, answer a few follow-up questions, and as a result, you will receive a complete technical specification that will help you effectively implement exactly what you need.
Use Plan Mode #
If you are building a complex app, we highly recommend starting with Plan mode. Yes, it will take more time and use more tokens, but it will allow you to plan the feature more thoroughly and achieve better results. This way, you’ll spend less time on revisions – or possibly avoid them altogether.
Which models should you use? #
During app development, you can use different models depending on the stage of development. For planning or complex features, you can use advanced models such as Claude Opus 4.7 or GPT 5.5. For simpler tasks, you can use models like Haiku or more cost-effective options like GLM/Kimi. FuseBase provides a CLI with ready-made components, so you don’t need to develop everything from scratch. This means you can build apps even with fairly standard models. However, we recommend starting with more powerful models and, over time, evaluating which model works best for your needs.