FuseBase Vibe Code
Create Apps with the FuseBase CLI: Setup Guide
Create FuseBase Apps with the FuseBase plugin or CLI. Follow setup videos and step-by-step instructions for Claude Code, Codex, and other IDEs.
What is the difference between the plugin and the CLI?
To create FuseBase Apps, you use the FuseBase CLI. You can use it in two ways:
- 1. With a plugin
- 2. With the CLI setup
The plugin is the easiest option. You work fully through a normal AI chat in Claude Code or Codex. You describe what you want to build, and the plugin handles the app creation flow for you.
The CLI setup is also simple. You only need to run a few basic commands at the beginning, such as initializing the FuseBase product. After that, most of the work still happens through AI chat. This option is best if you use another IDE or assistant, such as Cursor, OpenCode, or your own coding environment.
Both options create the same FuseBase Apps. The difference is only how you start and control the process.
Set up with a plugin
The plugin is the easiest way to create FuseBase Apps. You can work directly through AI chat: describe what you want to build, ask for changes, and let the plugin guide the app creation process.
Start with the video for the tool you use:
Claude Code setup
Watch this video if you want to create FuseBase Apps using the plugin in Claude Code.
Codex setup
Watch this video if you want to create FuseBase Apps using the plugin in Codex.
Prefer written instructions?
You can also follow the step-by-step setup guide below. The guide uses Claude Code as an example, but the same overall process applies to Codex.
- 1 Open Claude Code.
- 2 Go to the Code tab.
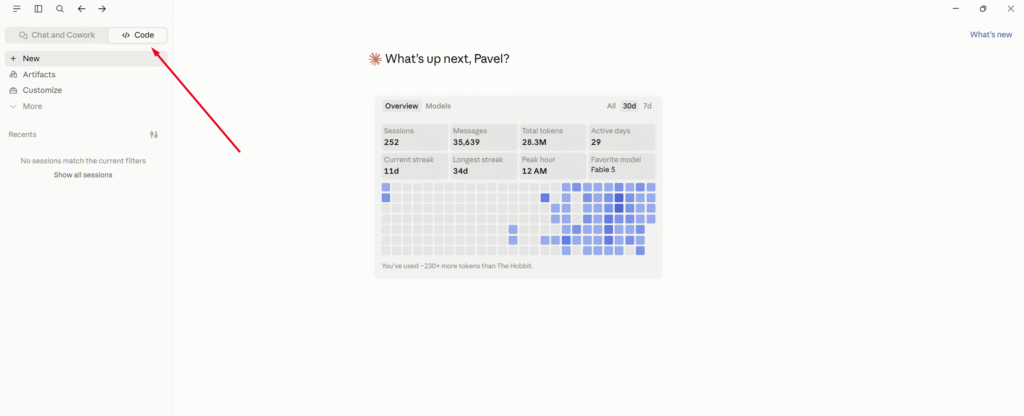
- 3 Click the + icon.
- 4 Click Add Plugins.
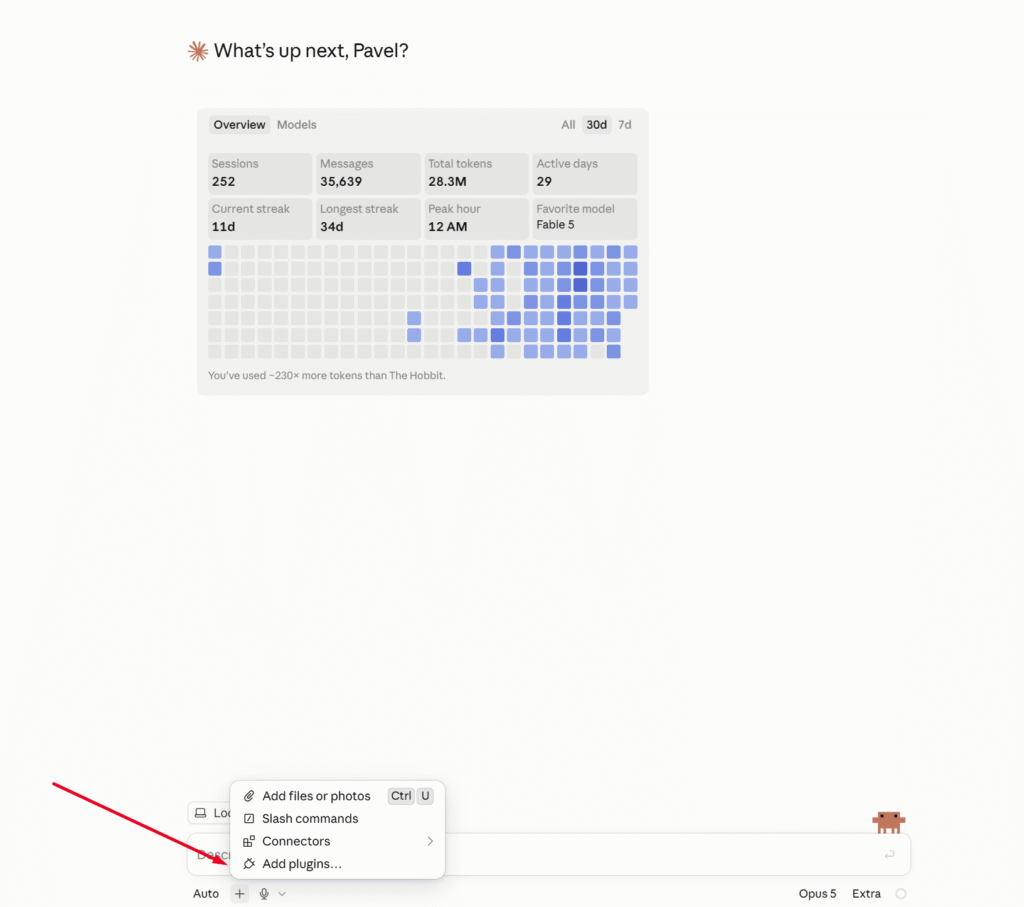
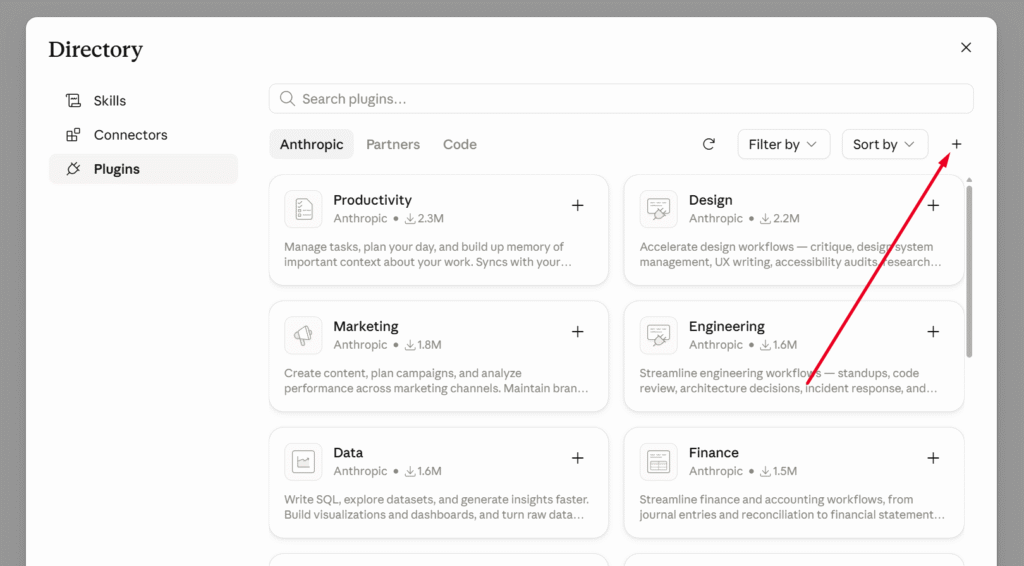
- 5 Click +.
- 6 Select Add from repository.
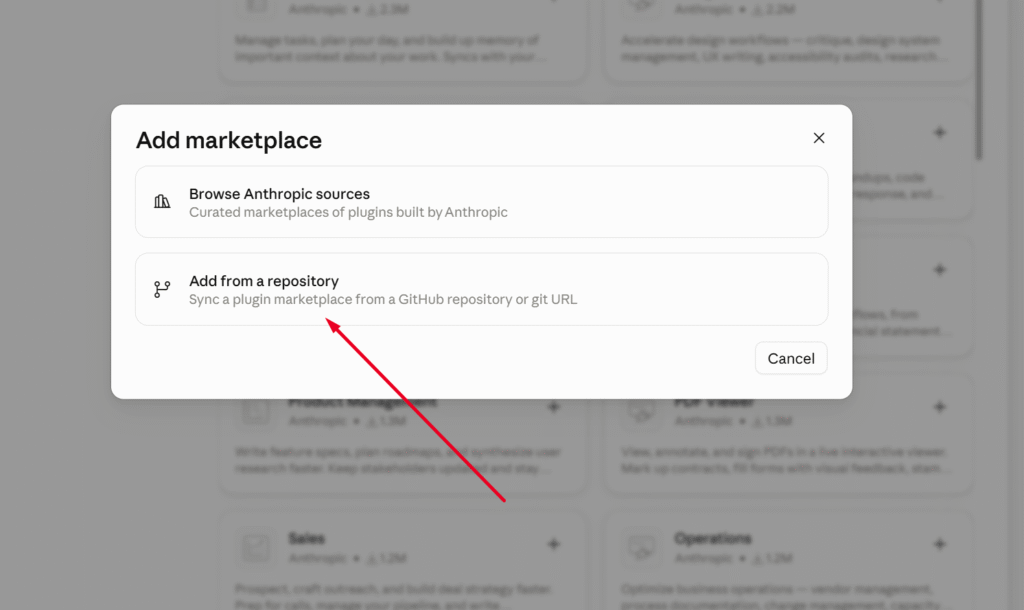
- 7 Add fusebase-dev/agent-plugins to the input field and click Sync.
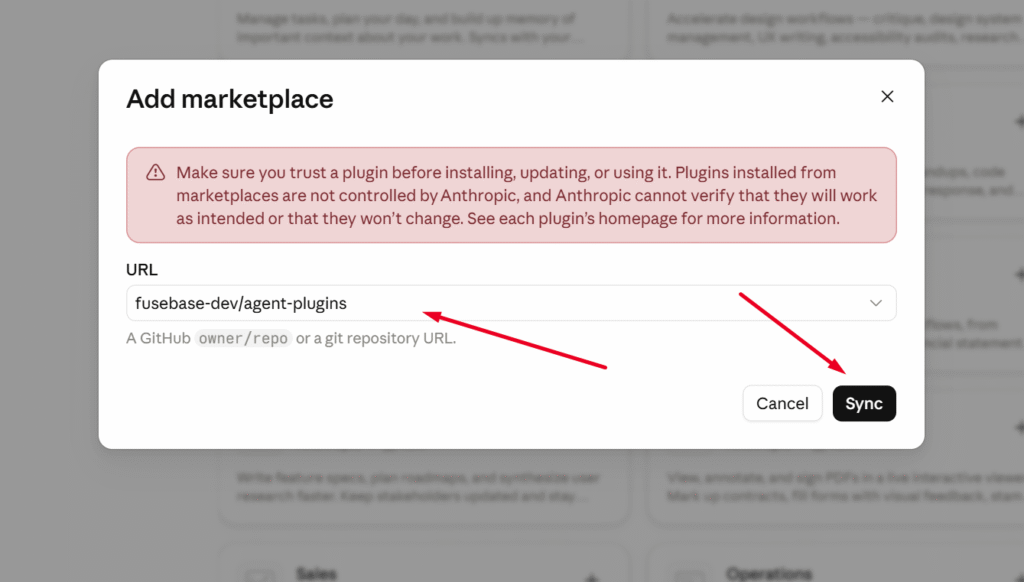
- 8 Click + to complete the plugin setup.
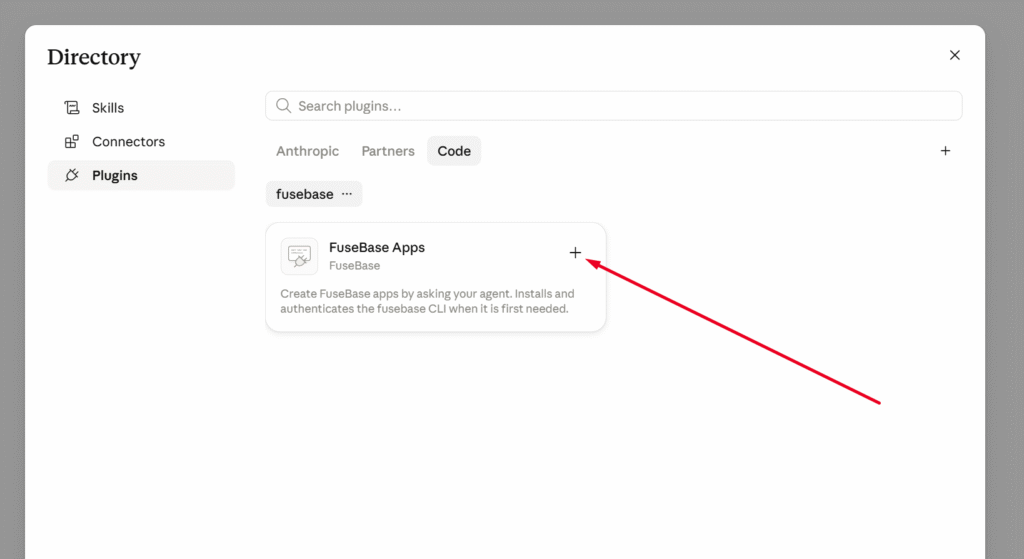
The setup is complete, and you can start creating apps.
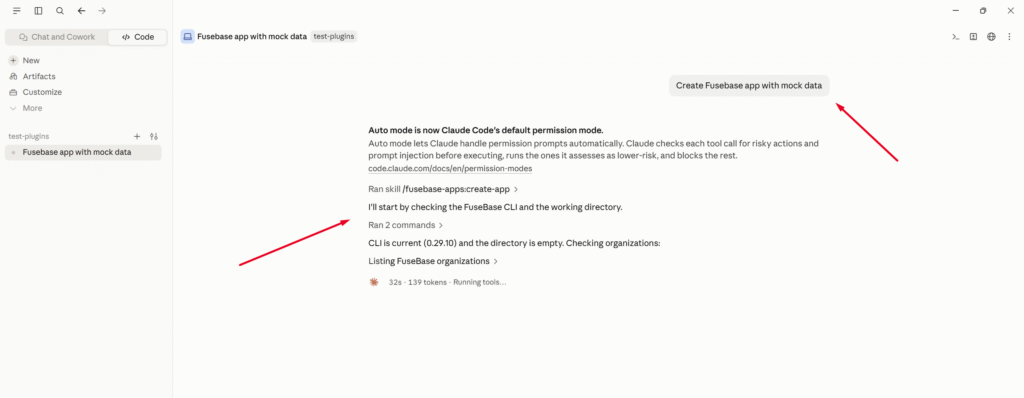
Simply provide the app description in the chat, and it will be implemented. All work will take place directly in the chat. If the CLI is not installed, the plugin will prompt you to install it. If you are not signed in to FuseBase, it will prompt you to authenticate.
Set up with the CLI
For other IDEs, you can use our standard CLI. Download the CLI from the FuseBase AI development site. ai-dev.thefusebase.com
Once you have downloaded it, launch the installer and wait for the installation to complete.
Unlike the plugin, after setting up the CLI, some commands will need to be entered in the terminal. With the plugin, all work can be done through the chat.
Step 1. Log in to FuseBase
Open your favorite IDE, such as Cursor or Claude Code, and go to the terminal.
We recommend creating a separate folder or project for each app.
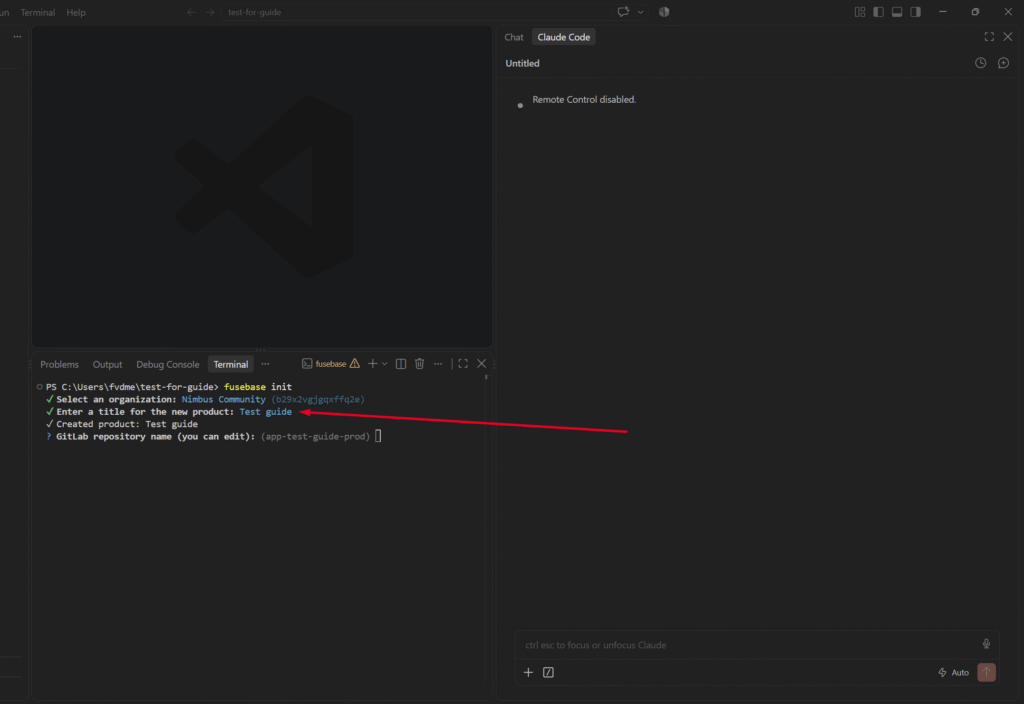
In the terminal, enter fusebase init. First, you will need to log in to FuseBase. A browser window will open automatically for authorization. You will only need to authorize once.
fusebase initStep 2. Create a product in FuseBase
Next, select the organization where the app will be created.
Specify the name of the product. For example, if you are creating a ticketing system, enter “Tickets”. The app name and its subdomain will be created from the product name, and you can always change them later.
That is it. You can now start creating your own products in FuseBase.
Step 3. Create an app
Next, create the app or apps you need. You can use any AI chat tool in your IDE, such as Claude Code or Copilot. Simply describe what you need.
For example, write something like:
I need a ticketing system that includes an admin side for managing tickets and a client side where clients can create tickets. Create a new database for the ticketing system. Only organization managers will have access to the admin section, while clients will have access to the client section.
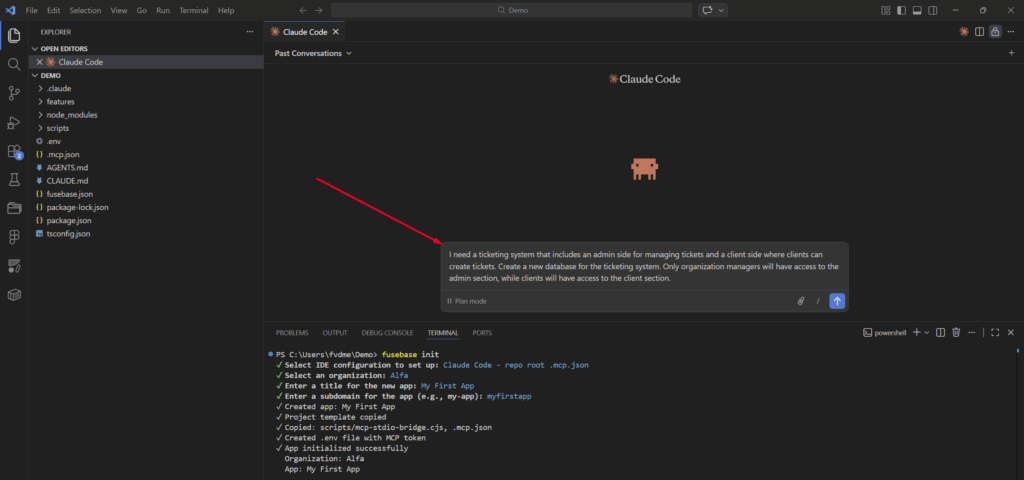
The AI will begin creating the feature. Answer any questions that may arise during the process.
Continue with the full guide to creating FuseBase Apps