In Fusebase dashboards, you can not only manage your current workspaces, clients, and portals, but also build a full-fledged CRM using custom columns or fields.
CRM (Customer Relationship Management) is a system that helps businesses keep all customer information, interactions, and deals in one place. It lets teams track leads, calls, emails, and follow-ups so nothing is missed. With CRM, you can automate routine tasks, personalize communication, and see which actions drive sales. Result: faster response, higher conversion, better retention, and clear analytics for smarter decisions.
For example, for a client, you can add various personal information such as date of birth, company name, personal traits, etc. For portals, you can add more deal-related details, such as deal stage, deal value, and so on.
This information can be added to dashboards through fields (in other CRMs they may also be referred to as attributes or properties).
Types of fields in Fusebase #
Each dashboard (workspaces, portals, and clients) has its own set of fields. In Fusebase, there are 2 types of fields:
- System fields: these are fields added by default and cannot be deleted (but can be hidden). For example, client name, portal link, analytics data, etc.
- Custom fields: these are fields you can add yourself. Their content can be modified and also deleted if no longer needed.
Field Management #
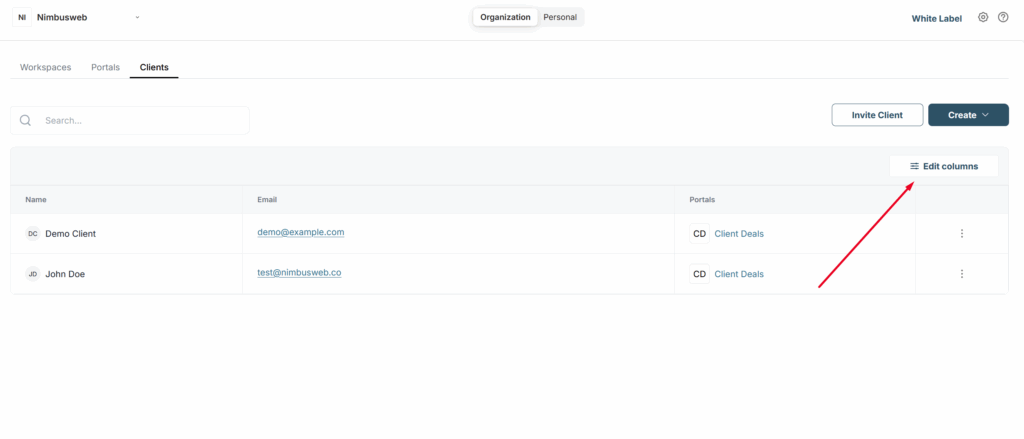
To manage dashboard fields, click Edit columns.
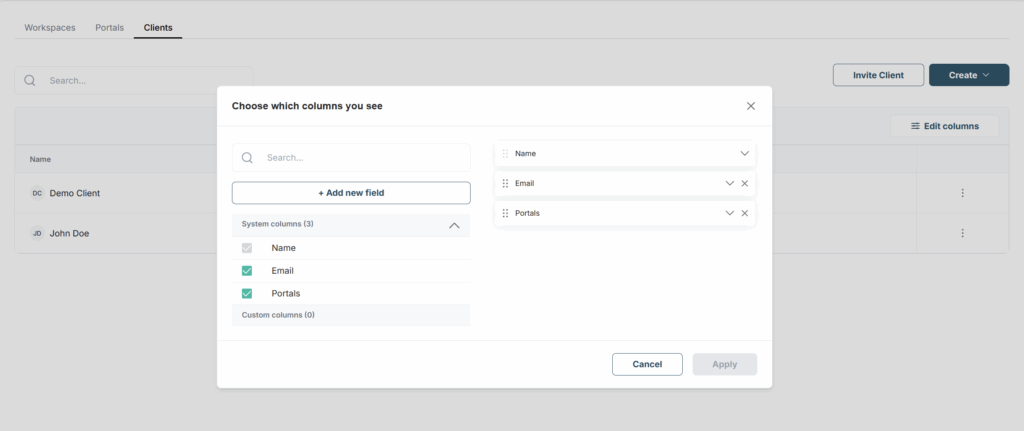
In the window that appears, you will see 2 lists:
- On the left – a list of all available fields
- On the right – a list of fields that are active in the current dashboard
Creating a new field #
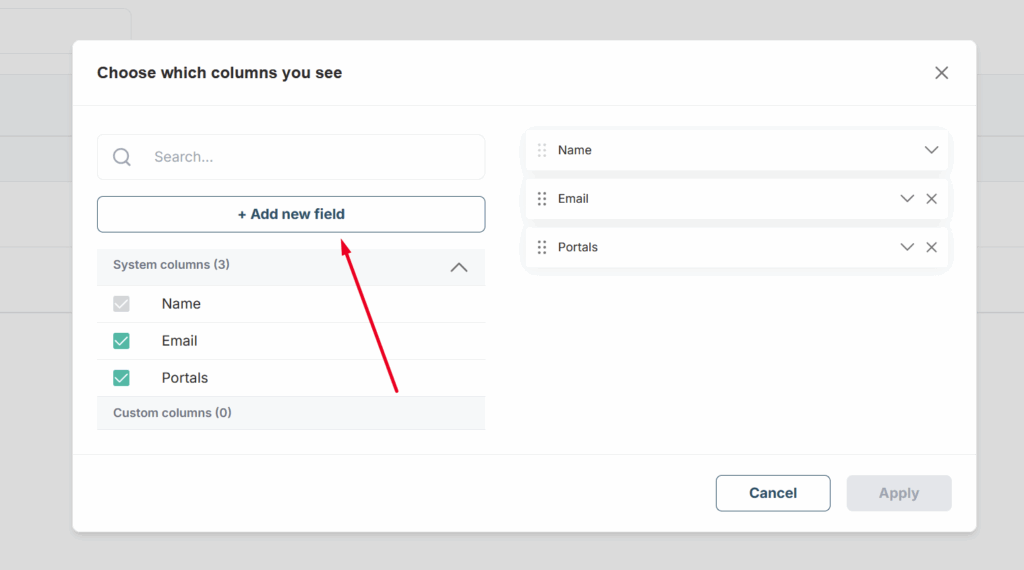
Now let’s try creating a new custom field. To do this, click Add new field and select the type of field you want to create.
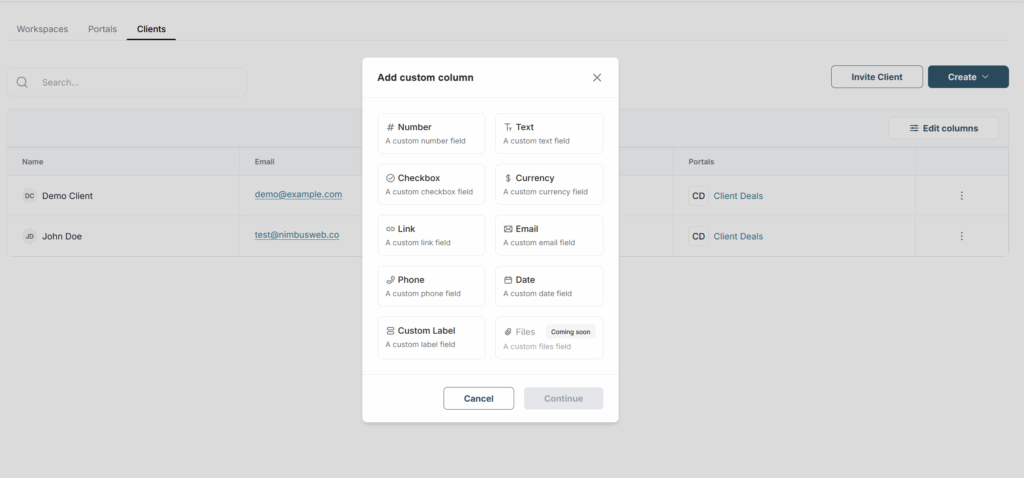
For example, let’s try adding a client’s date of birth. To do this, click on Date field and specify the field parameters. That is, specify the field name and the Date format.
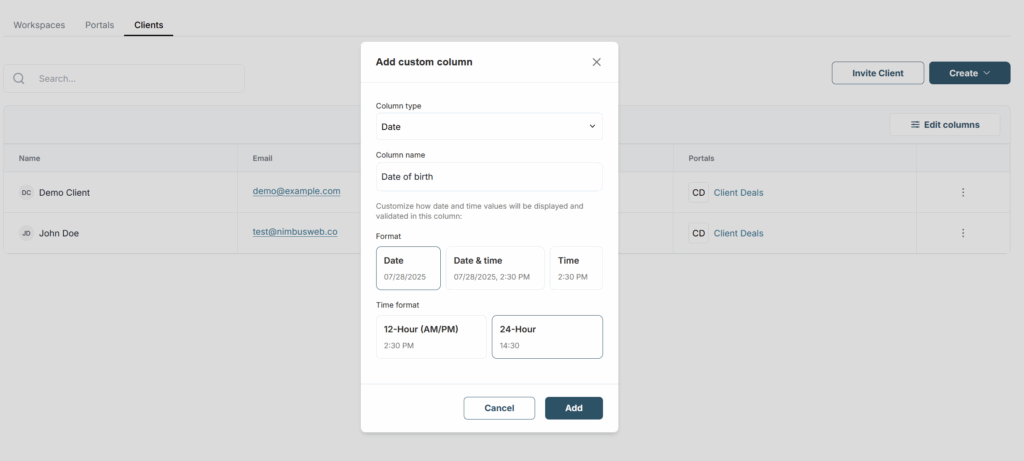
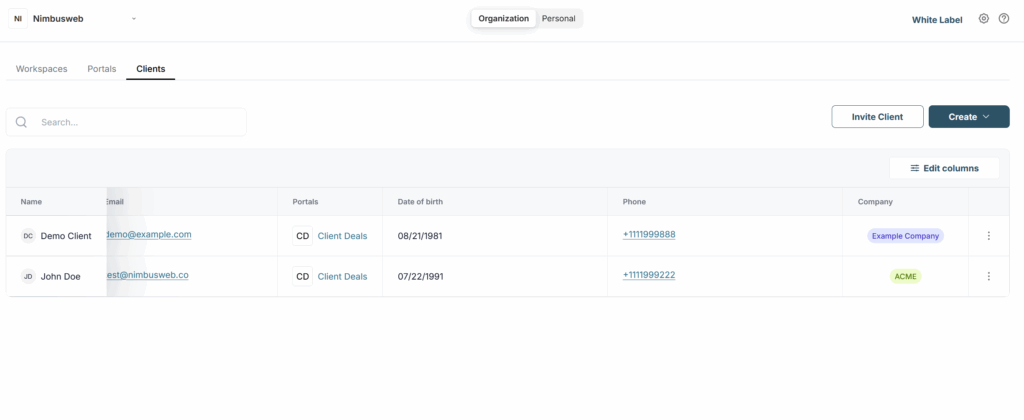
After creation, a new column with the field appears in the dashboard.
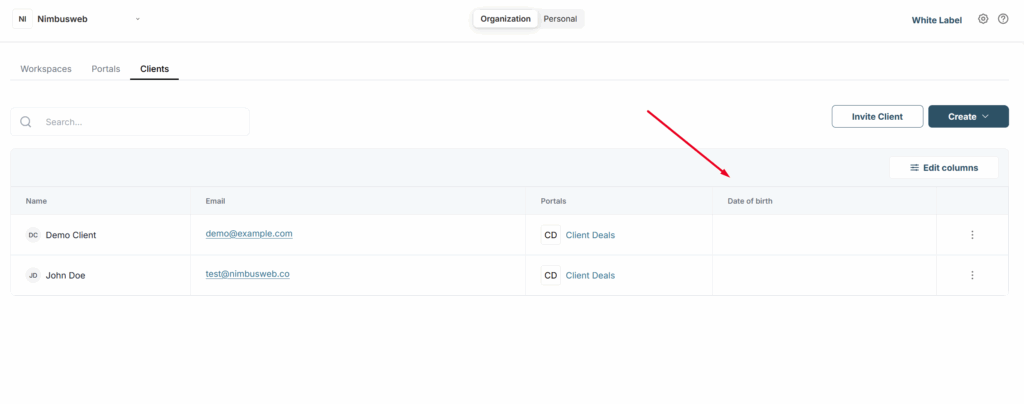
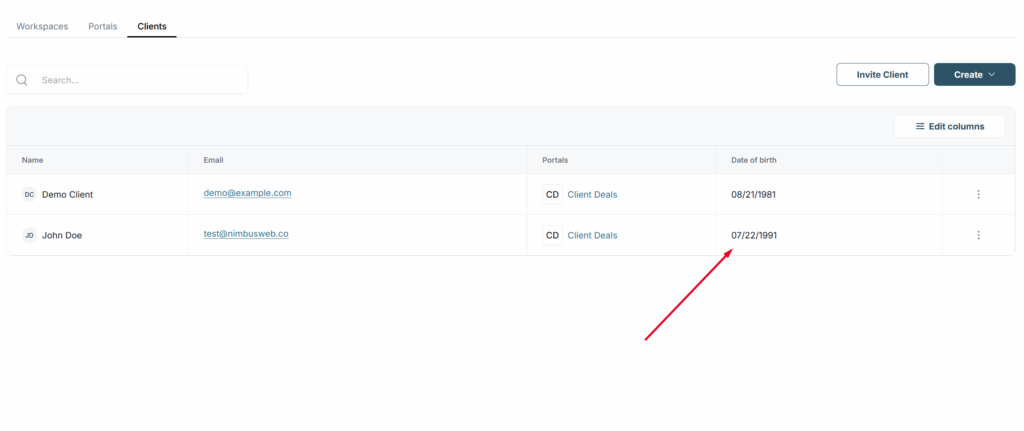
Click on it and enter the required date.
Next, for example, you can add the company name. Let’s try to do this using a Custom label.
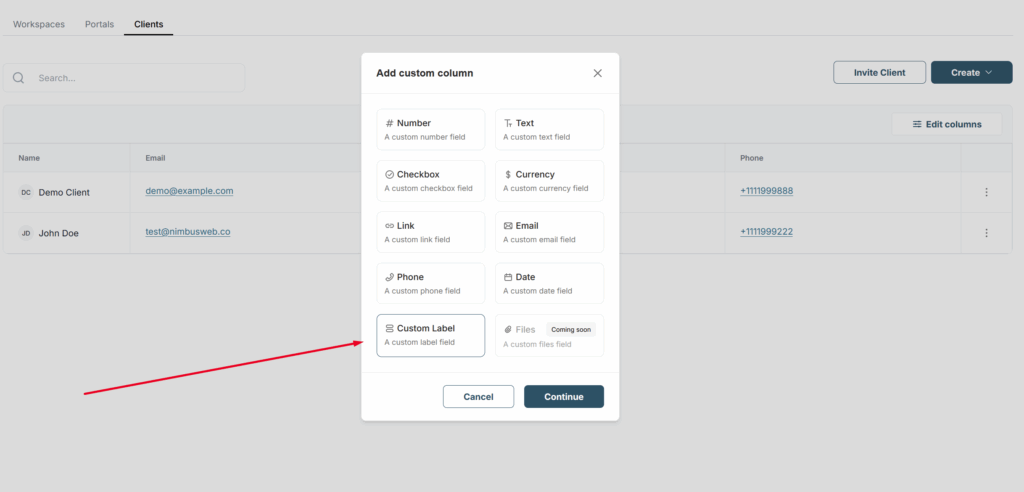
In Custom Label, you can provide the user with a choice of different options. Let’s try entering several company names.
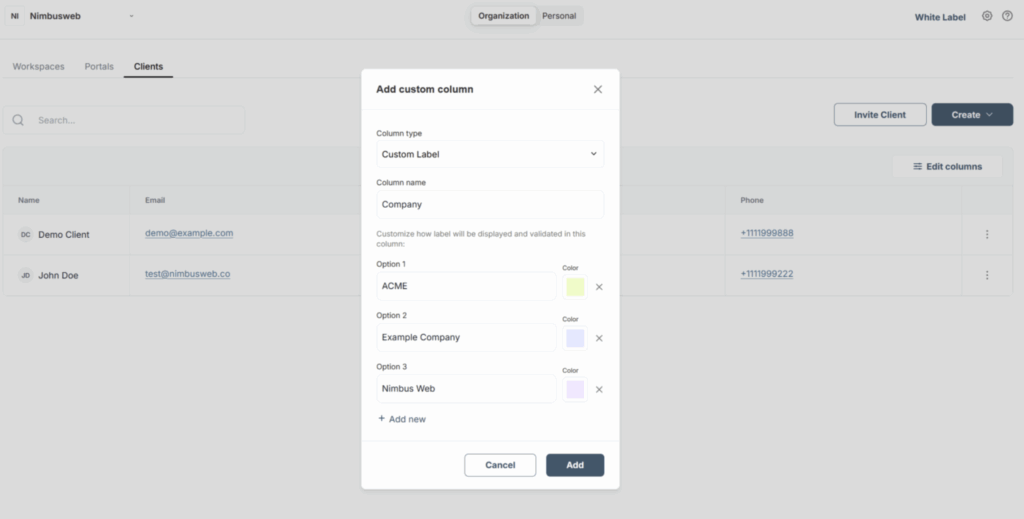
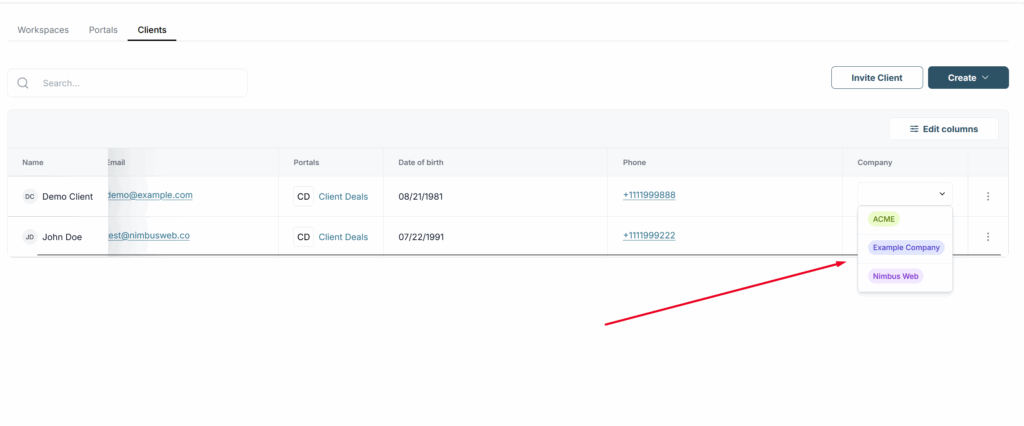
After adding the column, click on the cell to select the desired company from the list.
Editing field settings #
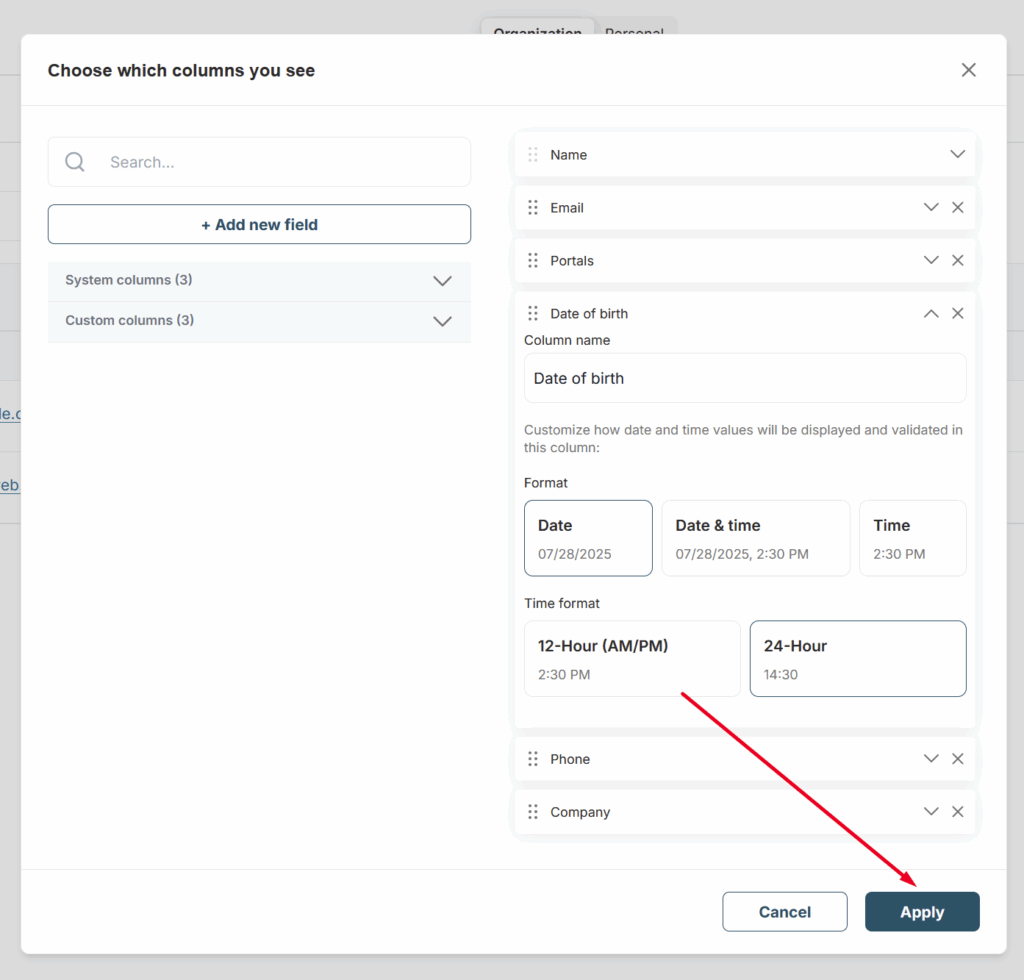
To edit a field’s settings (for example, change its name or the date format), click Edit columns and then click the arrow next to the desired field.
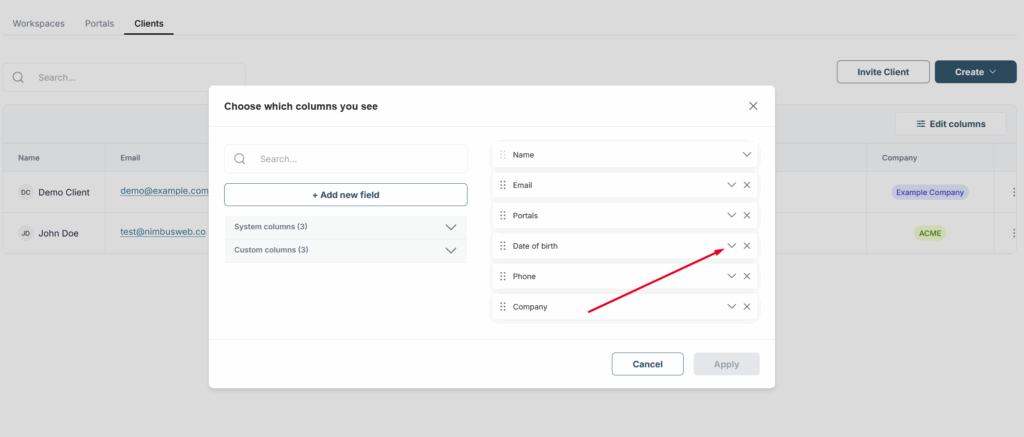
Next, adjust the settings as needed and click Apply.
Hiding columns #
If a field is not needed at the moment, you can simply hide it by clicking X. To bring it back, just click on it in the list of all fields.
How to reorder columns? #
If you want to change the order of columns, go to Edit columns, then click on the desired column and drag it to the needed position. After that, click Apply.
Unique Parameter for a Column #
For example, if you need each member in the table to have a unique email and want to prevent creating a member with a duplicate email, the Unique parameter for a column will help you.
You can activate the Unique parameter for both new and existing columns.

When this parameter is active, you won’t be able to add duplicate data in a new row if that value already exists in another row. This can apply to emails, dates, text, numbers, etc. If you attempt to enter duplicate data, you will see a corresponding message.
Column groups – simplifying data display in detailed view #
If you have many columns, even the detailed view can be hard to work with because there’s a lot of data and it can be difficult to read. You can group related columns into groups/sections that you can fold or unfold. You only see what you need, when you need it – so you work faster and make fewer mistakes.
You can read more about this feature here – https://thefusebase.com/guides/dashboard-crm/column-groups-simplifying-data-display-in-detailed-view/