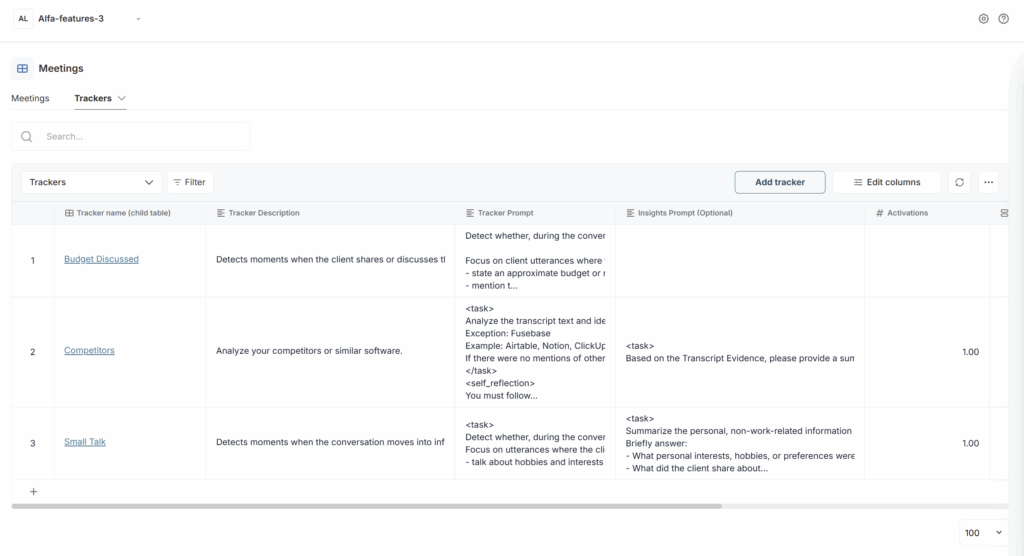
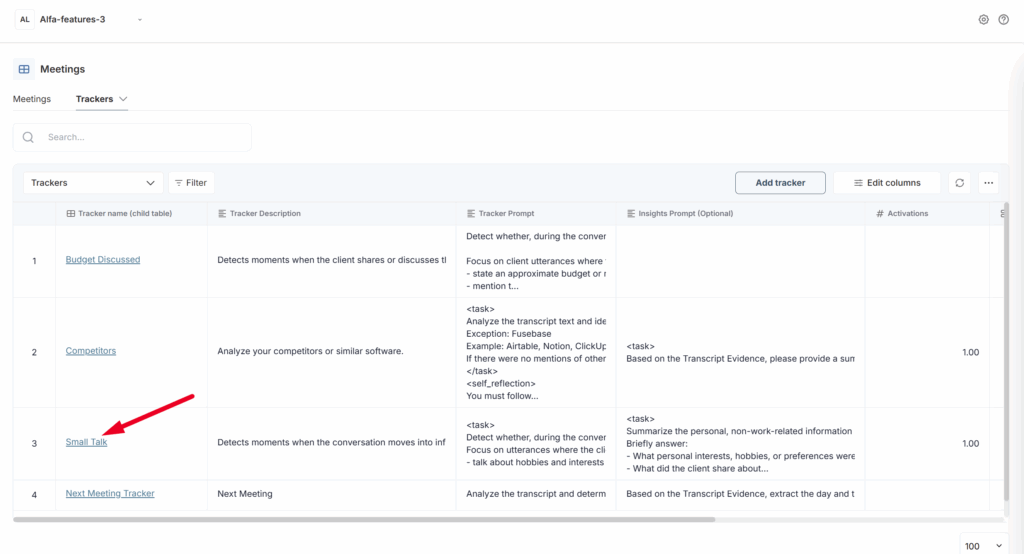
Next to the meetings dashboard, you can see the trackers table –
First, let’s explain what trackers are and why you need them. In Fusebase, trackers are a set of rules/keywords that the system uses to “catch” the right moments in a meeting recording and transcript.
Examples of trackers:
- Competitor mentions
- Questions about pricing/discounts
- Budget, timeline, and next-step discussions
- Promises from the sales rep (“I’ll send the proposal,” “Let’s have a call on Thursday”)
Essentially, a tracker = a filter that says: “Show me all moments where the client asked about pricing,” or “where the name of competitor X was mentioned.”
Why they’re needed and what the benefits are #
Quality and risk control
You can see how managers handle objections, discuss pricing, and mention competitors.
A leader doesn’t listen to every call end to end, but reviews only the phrases/situations that matter.
Topic analytics
How many times did people ask about discounts this week? How often does a specific competitor come up? At what stage of the funnel is budget discussed most often?
This helps product, marketing, and sales make decisions based on facts, not gut feelings.
Process consistency
If your script requires certain questions to be asked (for example, about budget or the decision maker), trackers help verify that it’s actually happening in real calls—not just on paper.
In short:
Trackers in Fusebase help you avoid drowning in hours of recordings by quickly finding the exact conversation fragments you need, measuring key patterns (pricing, competitors, next steps, etc.), and using that for analytics and sales team coaching.
You shouldn’t think that trackers can only be used in the Sales niche. They can be adapted for HR, Education, Legal, etc. In practice, in almost any niche you can create trackers that will catch in a conversation what you specifically need.
Going forward, we plan to create trackers not only for transcripts, but also for emails, documents, and so on.
Create Your Own Tracker #
Now let’s take a closer look at the trackers table. By default, we’ve already created a few trackers for you. Let’s see what parts each tracker consists of. And to understand it better, we’ll create our own tracker. For example, we want to understand whether the next meeting was discussed on the call, and if yes — when it was scheduled.
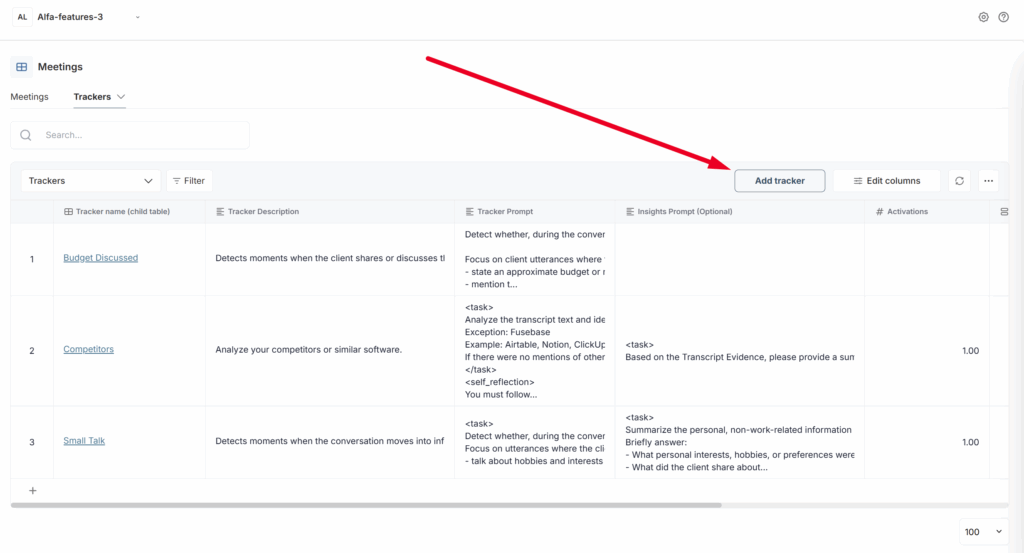
1) First, click Add tracker
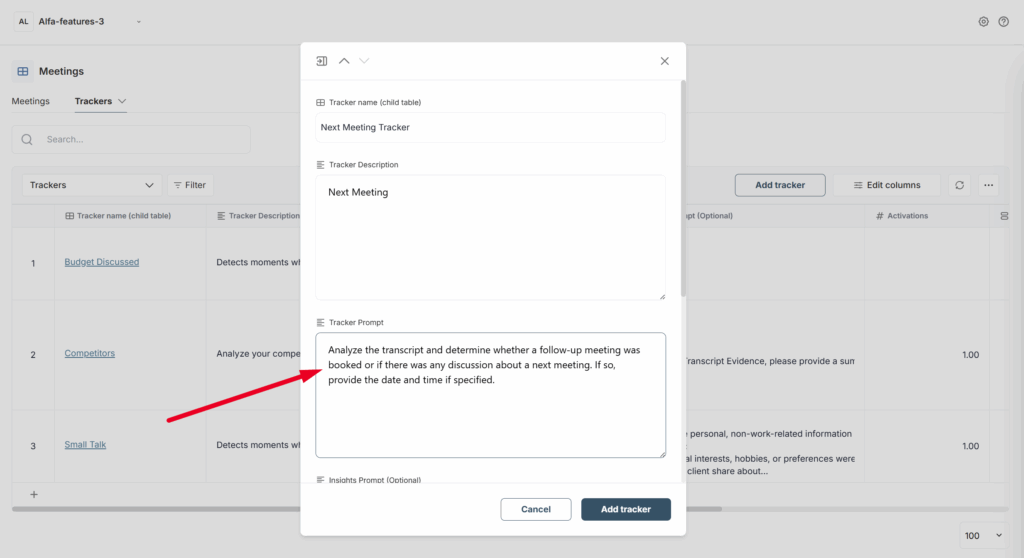
2) Tracker name and Tracker description – here you can find the tracker’s name, as well as a description of what exactly it does.
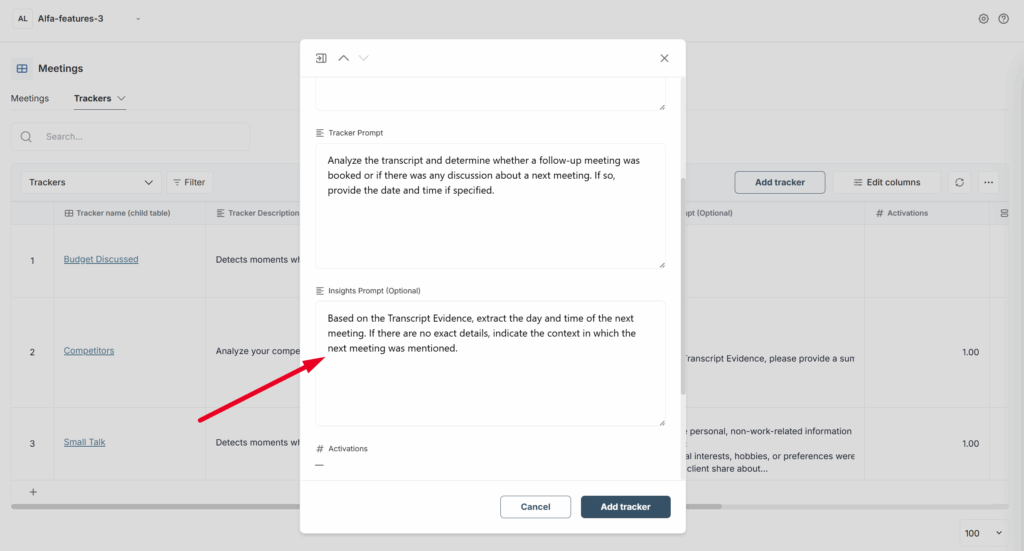
3) Tracker Prompt – this is where we tell our AI assistant what exactly you want to track during the meeting. We agreed that we’re making a tracker to track meeting bookings, so we add this prompt:
Analyze the transcript and determine whether a follow-up meeting was booked or if there was any discussion about a next meeting. If so, provide the date and time if specified.
If you want, you can change it however you like.
4) Insights Prompt – imagine the tracker has triggered and, for example, found conditions in the transcript that match the trackers and showed fragments of the call. But what if there are many of them, or you need specific information? That’s what the Insight column is for: by default, we show a summary of what the tracker found in the call. But you can also manually specify a prompt and explicitly write your requirements.
For example, in our case we want to immediately see the date and time of the next meeting in the column if it was scheduled. So we write this prompt:
Based on the Transcript Evidence, extract the day and time of the next meeting. If there are no exact details, indicate the context in which the next meeting was mentioned.
5) Is Active – here we specify whether the tracker is active or not. If the tracker is active, it is automatically applied to all new meetings, as long as a transcript is available.
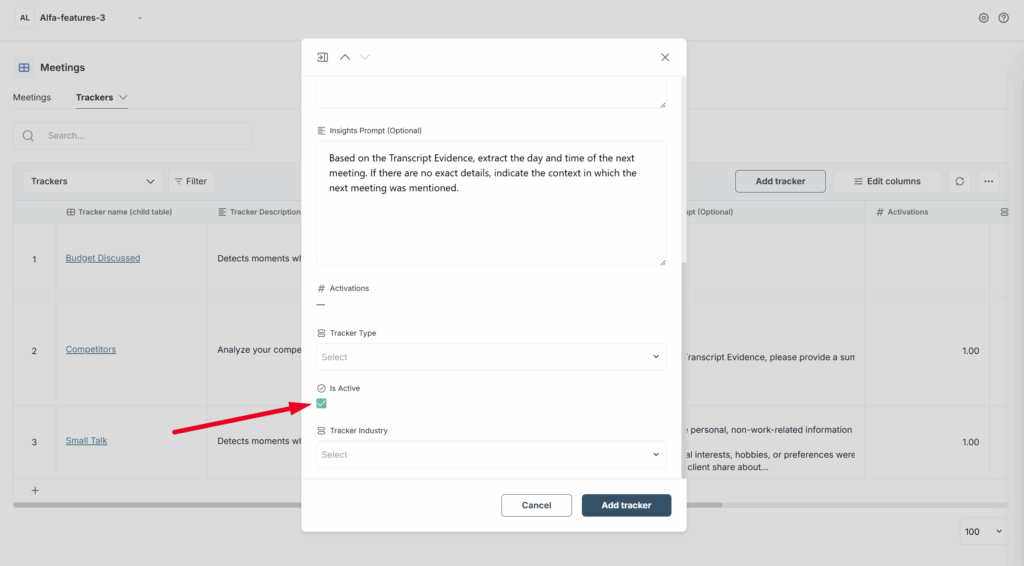
6) Tracker Industry and Tracker Type – optional columns, and you can choose the values as you like.
7) Next, click Add tracker to create a new tracker.
Tracker Results #
You have set up the trackers and now want to view their results. It is important to note that currently, trackers are automatically triggered for all newly added transcripts.
If you already have videos with transcripts, you can also apply the trackers to them.
To view the tracker results, you need to go to the tracker table and click on the desired tracker.
A table with the tracker results will then open.
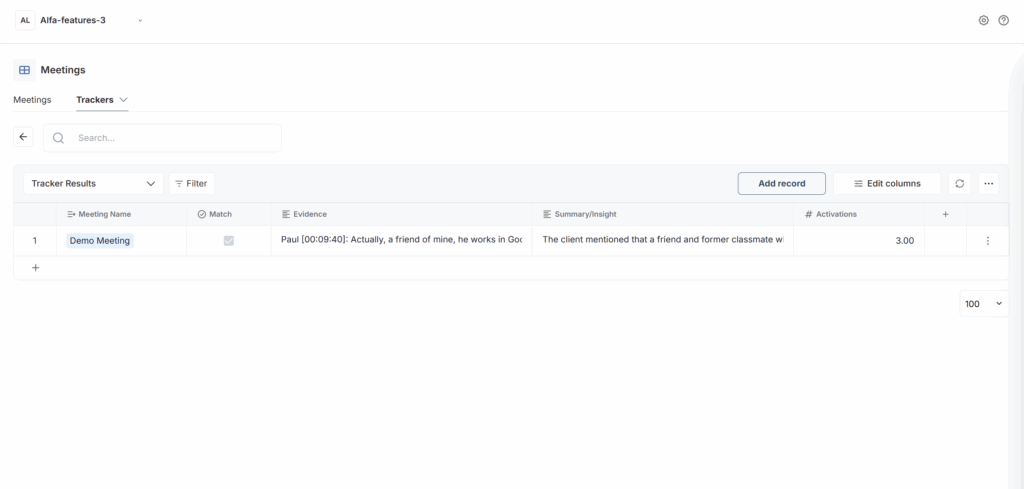
Let’s review the data available to us:
Meeting Name – the name of the meeting where the tracker was triggered. By clicking on the meeting name, you can view its details.
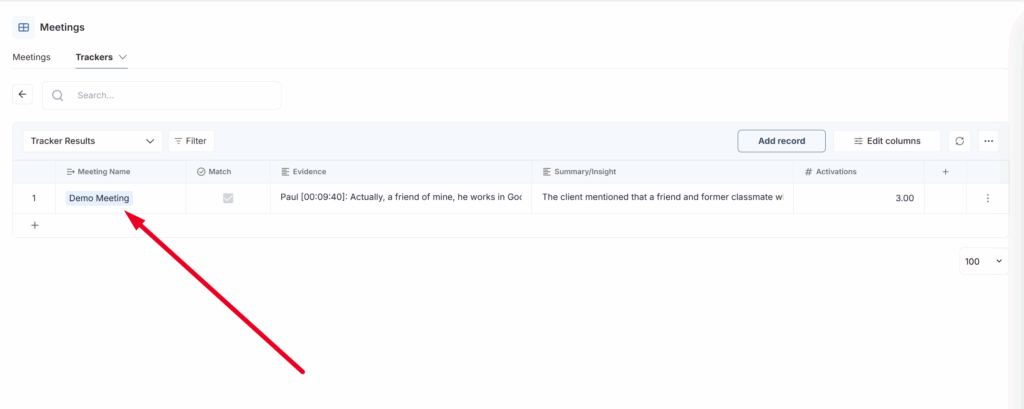
Match – if the tracker found information in the video that matches its conditions, Match will be active. If nothing in the video matches the tracker conditions, then Match will be inactive.
Evidence – if the tracker found information in the video that meets its conditions, Evidence will display transcript fragments that correspond to the tracker’s criteria, including the video timeline, speaker’s name, and transcript text.
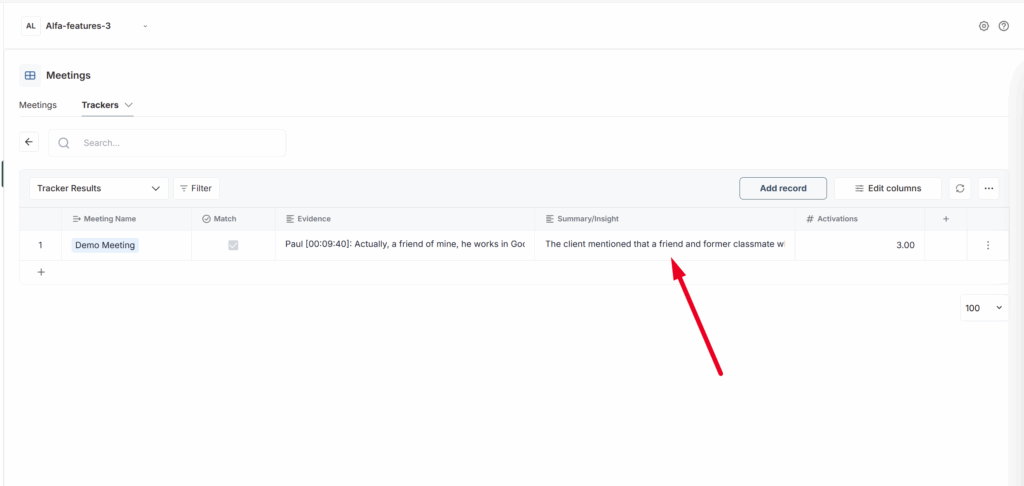
Summary/Insight – if there is Evidence, the summary provides a concise overview highlighting the most important information from it.
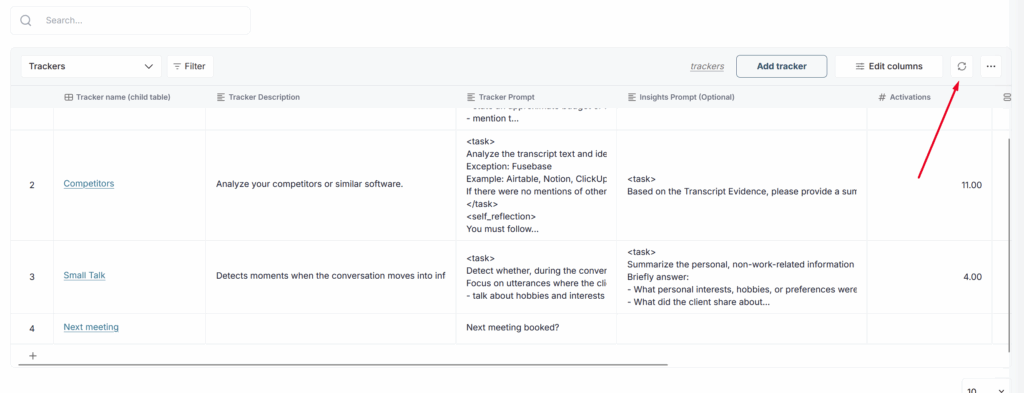
Activations – the number of times the tracker was triggered during a meeting. For example, if the tracker monitors competitor mentions and they were mentioned three times at different points during the meeting, the number of activations will be 3.
I added a meeting and a transcript, but I don’t see the tracker results. Why is that? #
The processing speed of the transcript by the tracker depends on several factors, primarily the total number of videos in the queue. If there are many videos, there may be slight delays. Typically, the tracker processes a video within 3-5 minutes after it is added. It’s also possible that the video has already been processed, but you need to refresh the dashboard to see the results. To do this, simply refresh the page or click the dashboard refresh button.