In this guide, we will show you how to transfer files from Google Drive to the database. You can use this example to transfer files from other services as well, and you can move files not only into tables, but also, for example, into pages.
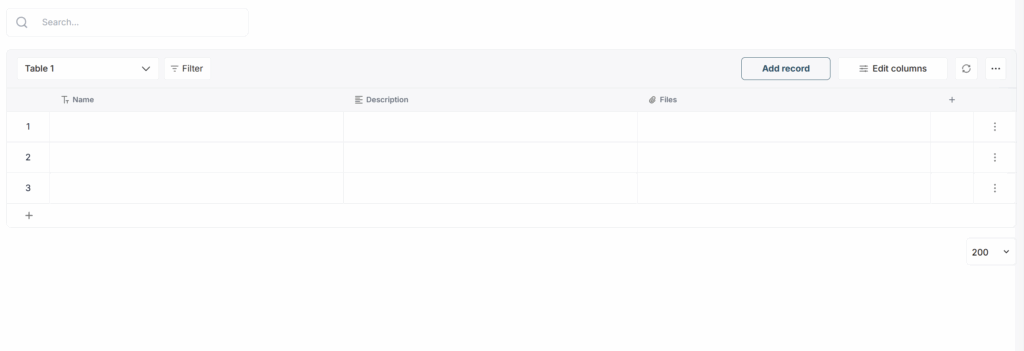
1) First, let’s prepare the table where the files will be transferred. You can choose the list of columns yourself, but the main requirement is to include a column of the Files type.
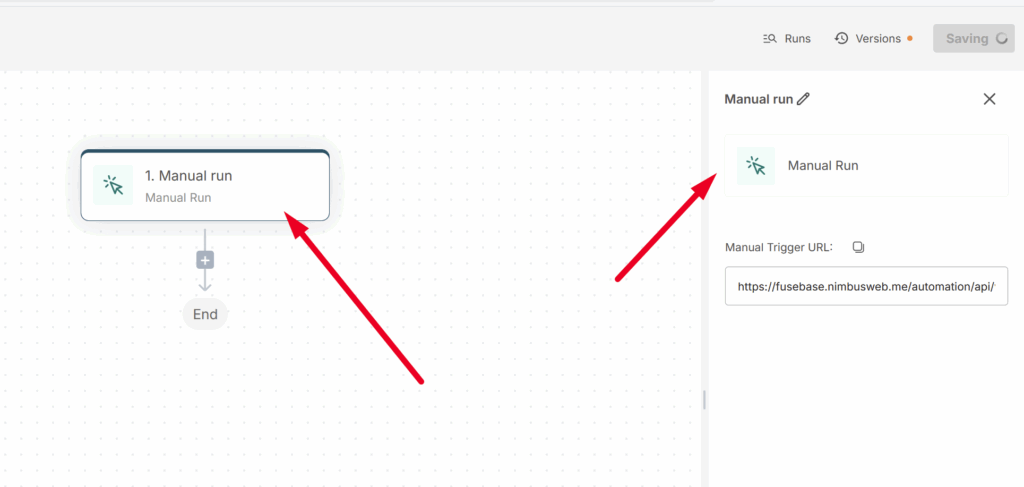
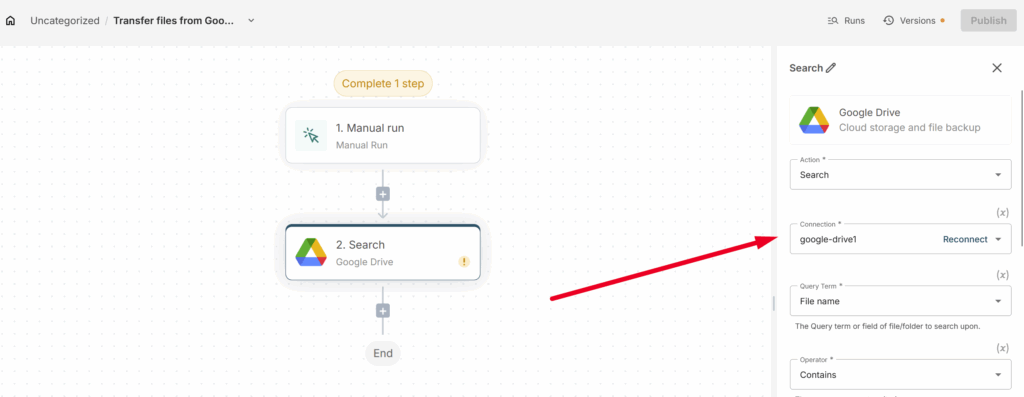
2) Next, go to Automation and create a new flow. Select Manual run as the trigger.
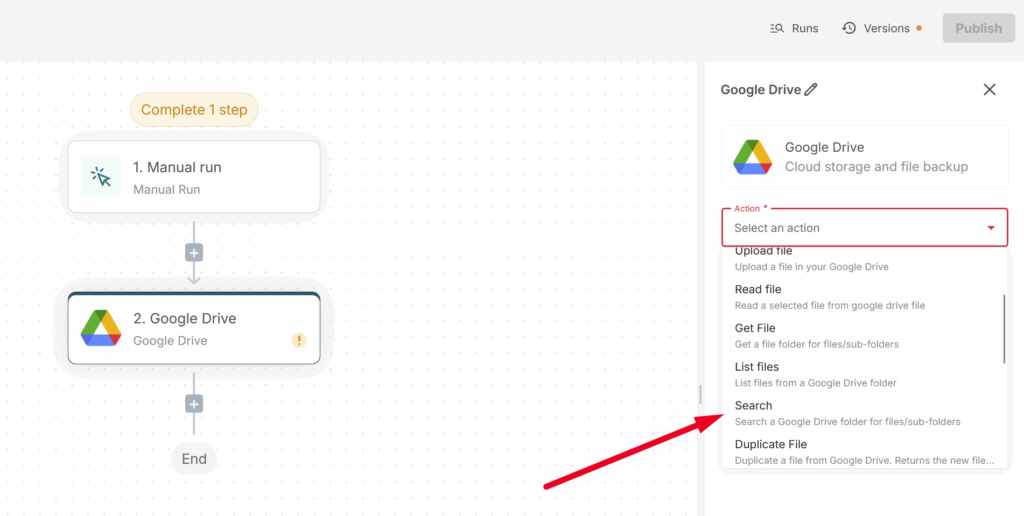
3) Next, we need to prepare a list of files from Google Drive for transfer. To do this, select the action Google Drive -> Search.
4) Next, connect your Google Drive account.
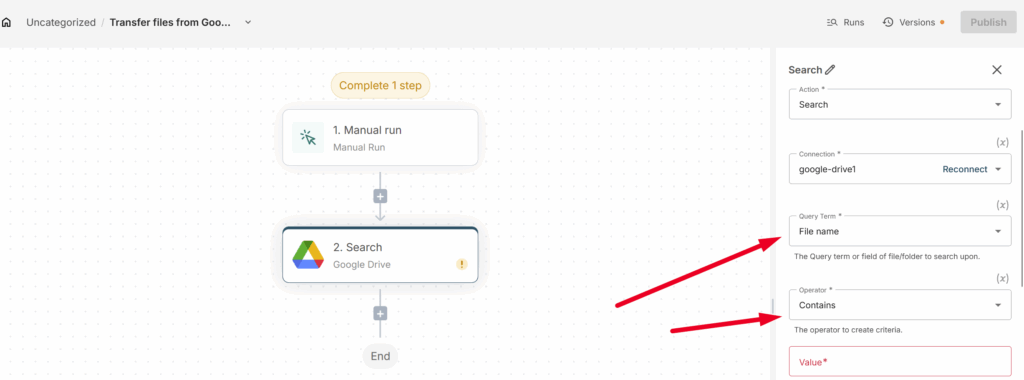
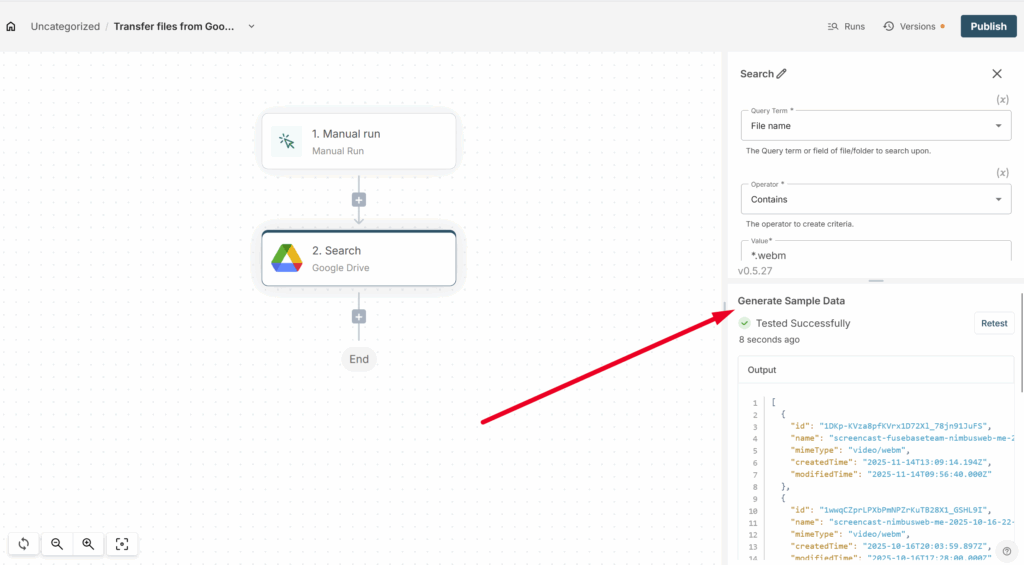
5) Then, select File Name in Query Name and Contains in Operator.
6) In Value, you need to specify the file mask for the files you want to transfer. In our case, we want to transfer only videos in webm format, so we enter *.webm. If you want to transfer all files from a folder, enter *.*
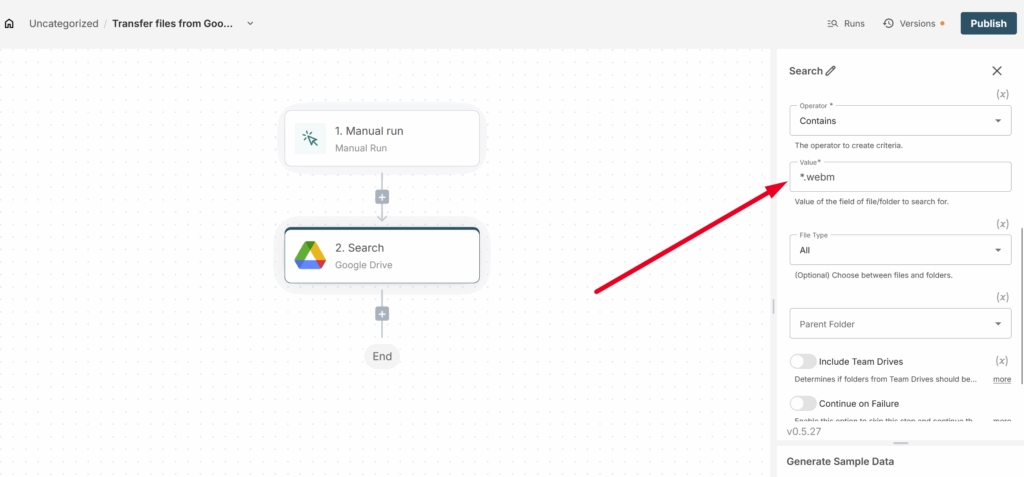
In Fill Type, select All.
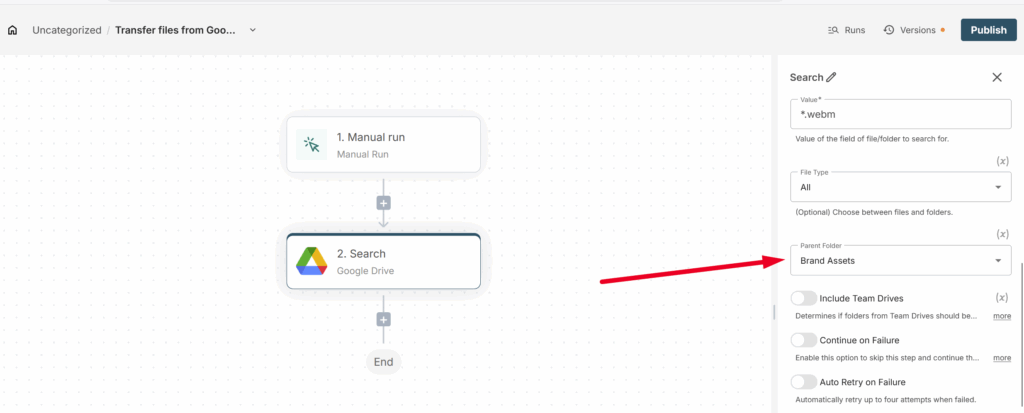
7) Next, specify the folder from which the files will be transferred.
8) Next, click on Generate Sample Data to load test data. This will be important for the following steps.
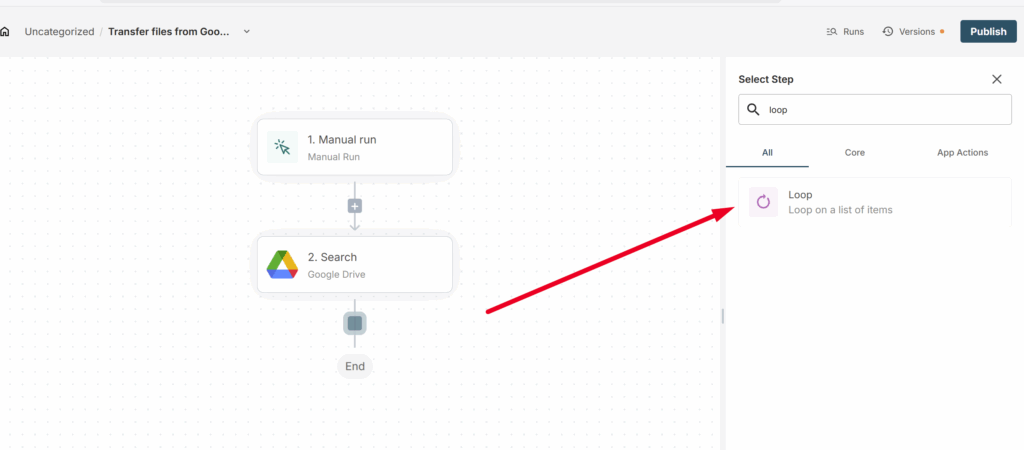
9) We need to transfer not just one file to Fusebase, but all the files found, one by one. To do this, you will use the Loop action, which you need to add.
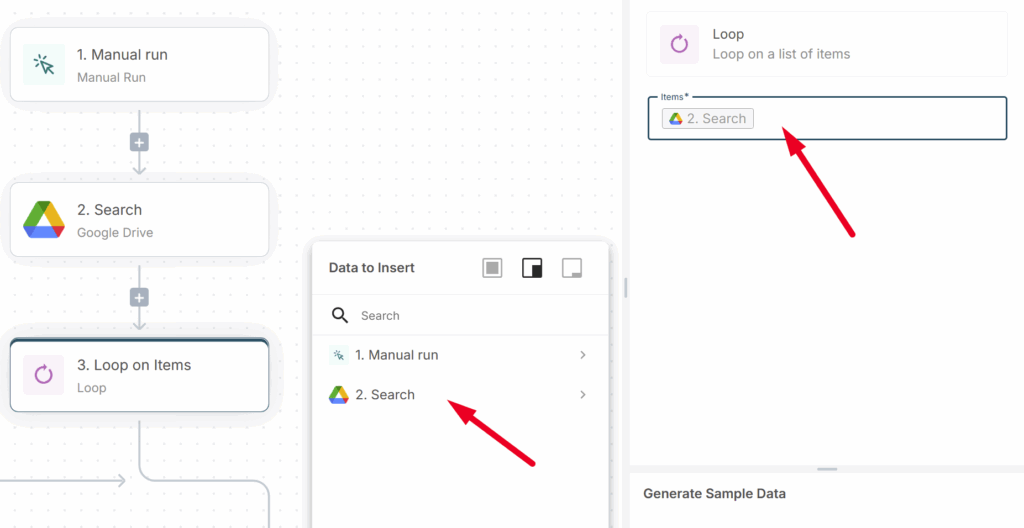
10) In Items, select the entire Search array from the previous action.
11) Click on Test Step to retrieve data for the next steps.

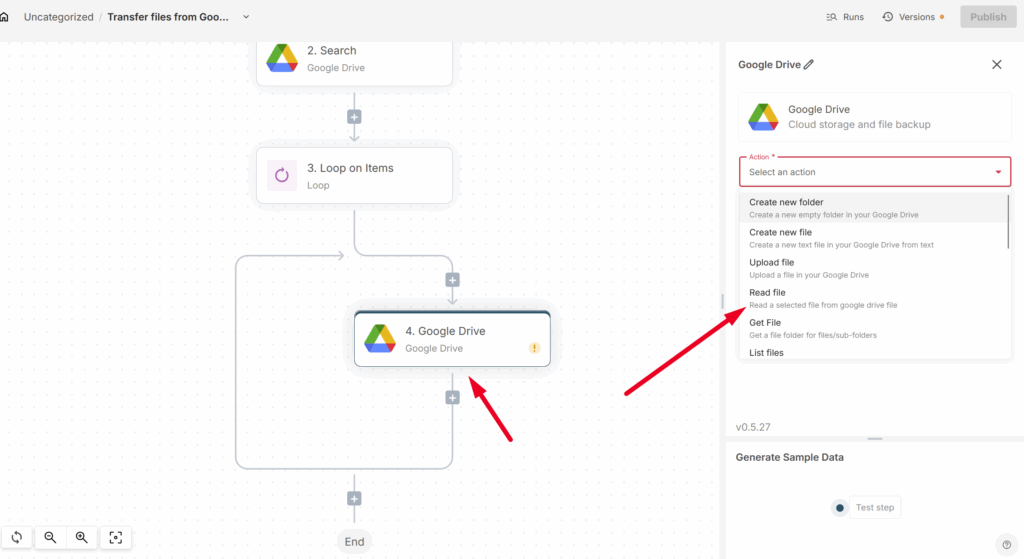
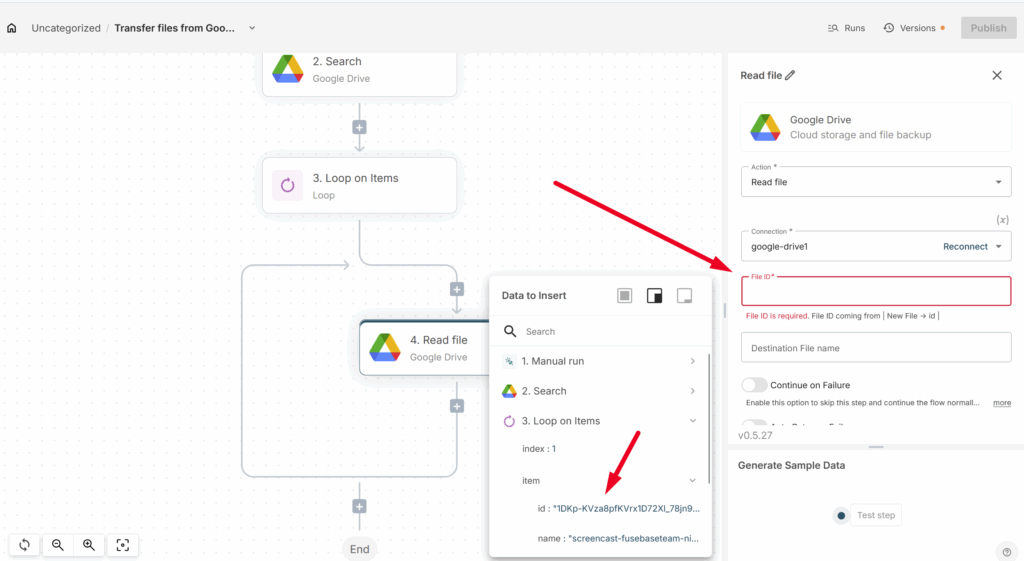
12) Next, we need to get a direct link to the file in order to download it. To do this, within the Loop action, click on + and select Google Drive -> Read.
13) In the File ID input, specify the file ID, which you can take from the Loop action –
For File Name, select the File Name from the Loop action –
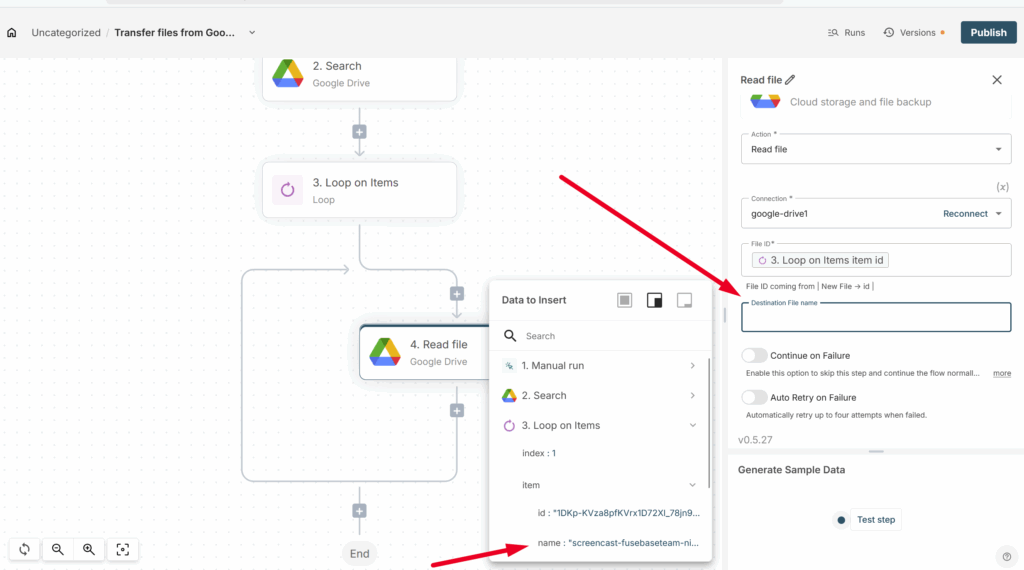
Don’t forget to click on Test Step to retrieve the data (in our case, the file link).

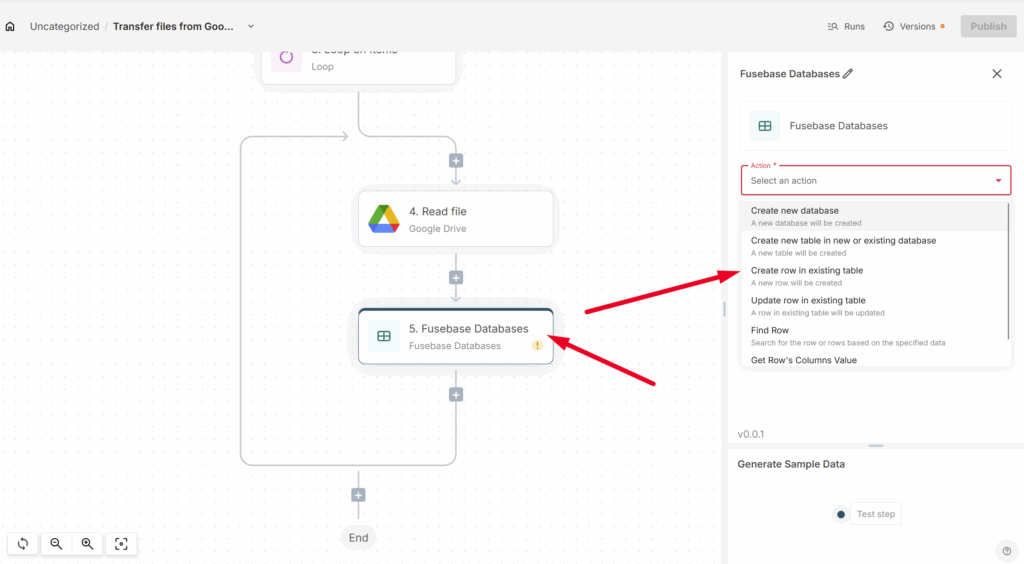
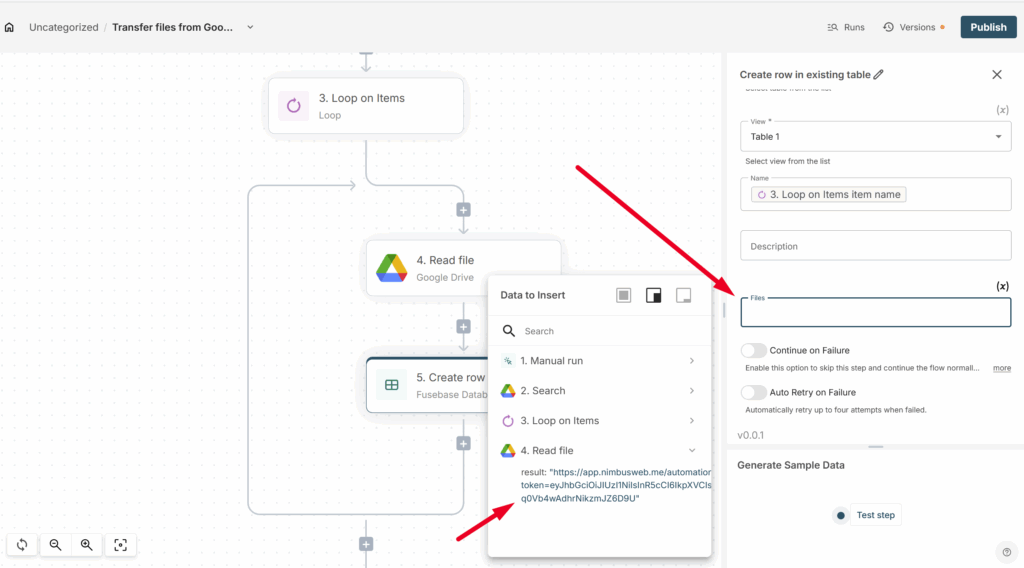
14) Next, we need to add the action for uploading files to the database. To do this, within the Loop action, add Fusebase Database -> Create row.
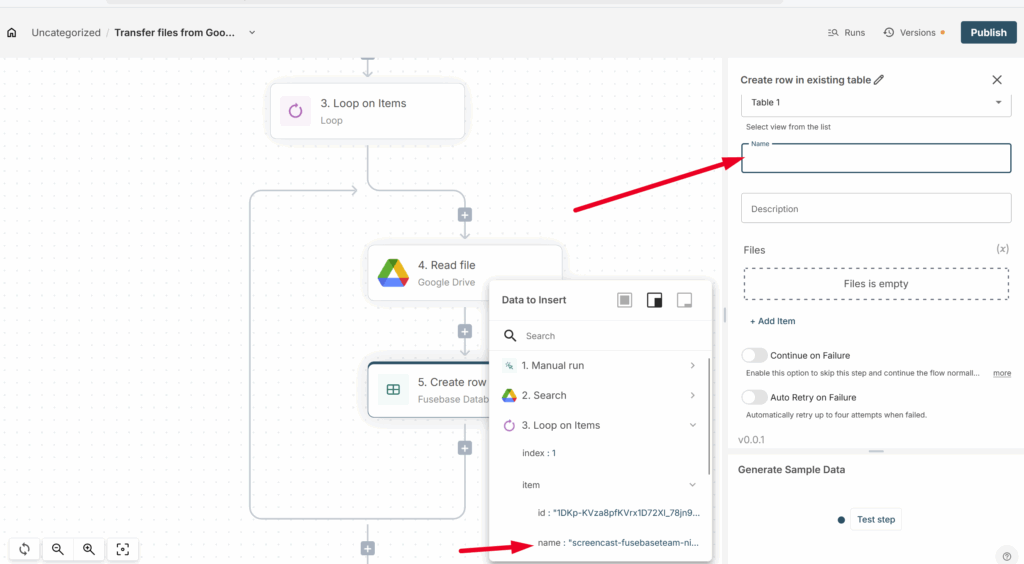
15) Select the database, table, and the required view.

Next, you need to specify the file name and link in the corresponding columns. In the Name field, enter the file name from the Loop action, and in the File field, add the file link from the Read action.
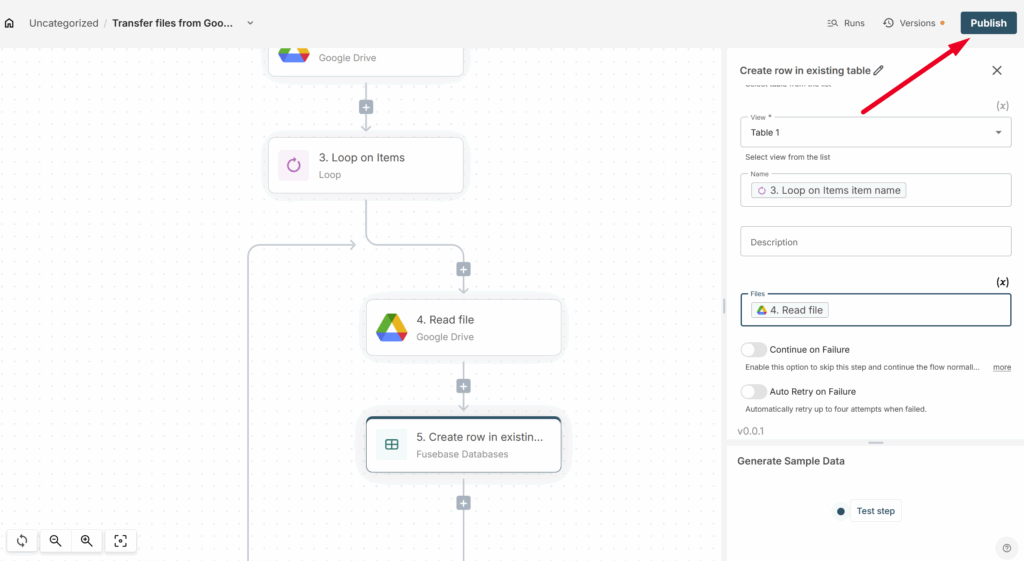
16) Next, click on Publish to save the flow.
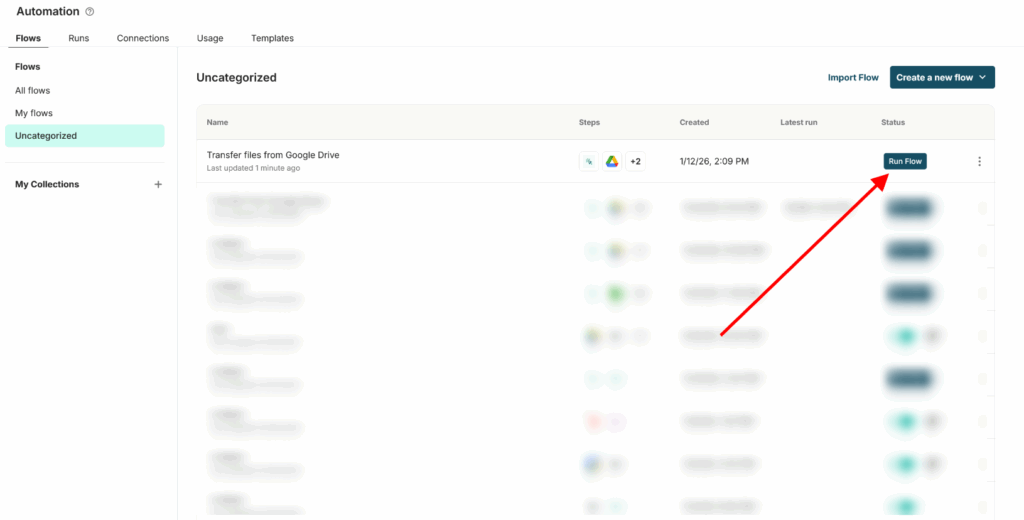
17) Click on Run to start the flow. After the flow has successfully completed, you can change the folder in Google Drive if, for example, you need to transfer files from different folders, and then run the flow again.