A Webhook Trigger allows you to start an automation flow by sending an HTTP request to a unique webhook URL. This is useful when you want your automation to react to events or data coming from other systems or applications.
Why This Is Useful
- Real-time Automation: Trigger workflows immediately when an event happens (e.g., new order, form submission).
- Data Transfer: Easily pass structured data between different applications.
- Integration: Connect external services to your automation system without manual steps.
Below we will show the basic settings: how to get the webhook URL and which settings to pass.
1) Create an automation flow.
2) Select Webhook as the trigger.
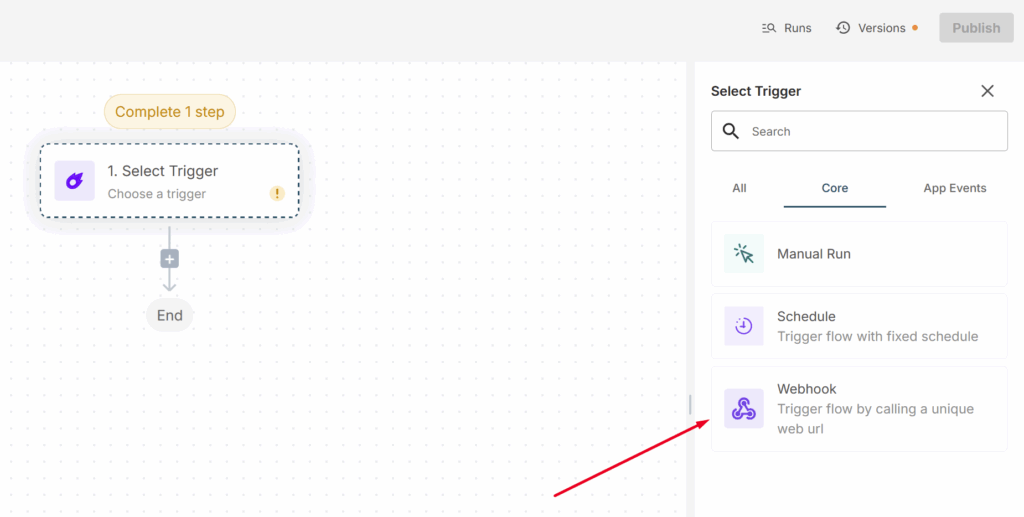
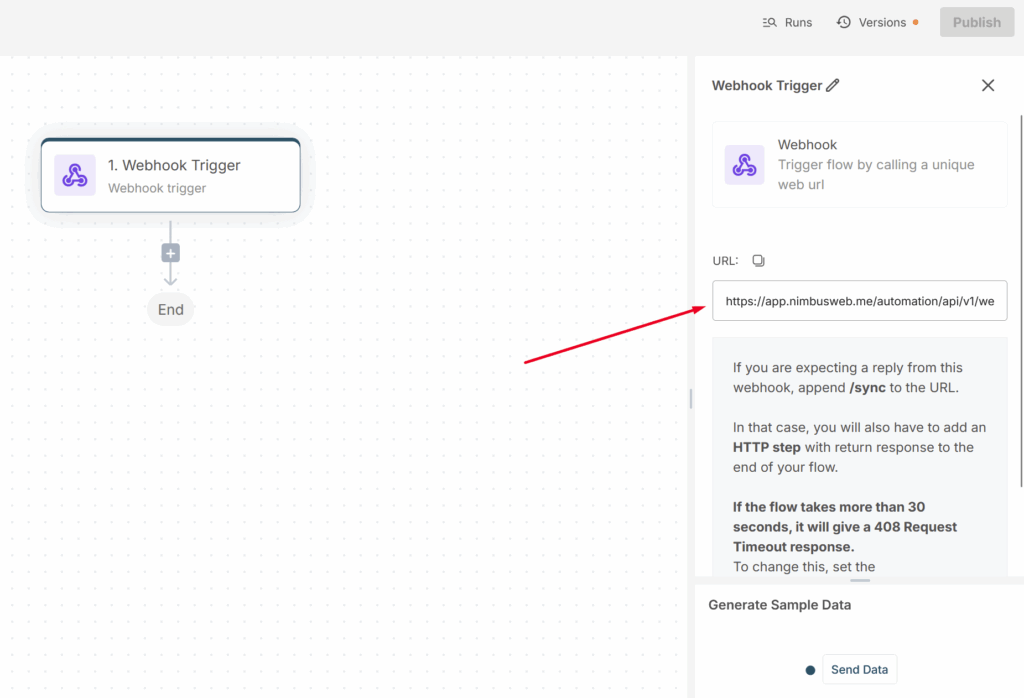
3) Copy the webhook URL and specify it in the application that should send the request to the webhook.
Request Method
Use the POST method when sending a request to the webhook URL.
Request Headers
You must include the following header: Content-Type: application/json
Request Body (Data)
Send the data you want to pass into the automation flow in JSON format.
For example:
{
  "event": "new_order",
  "order_id": "12345",
  "customer": "John Doe",
  "amount": 250
}
The keys and values you include here will be available in your automation workflow for further actions.
Response Handling
- If you expect a reply from the webhook, append /sync to the URL.
- In that case, add an HTTP step with a return response at the end of your flow.
- Note: If the flow takes more than 30 seconds, the system will return a 408 Request Timeout.
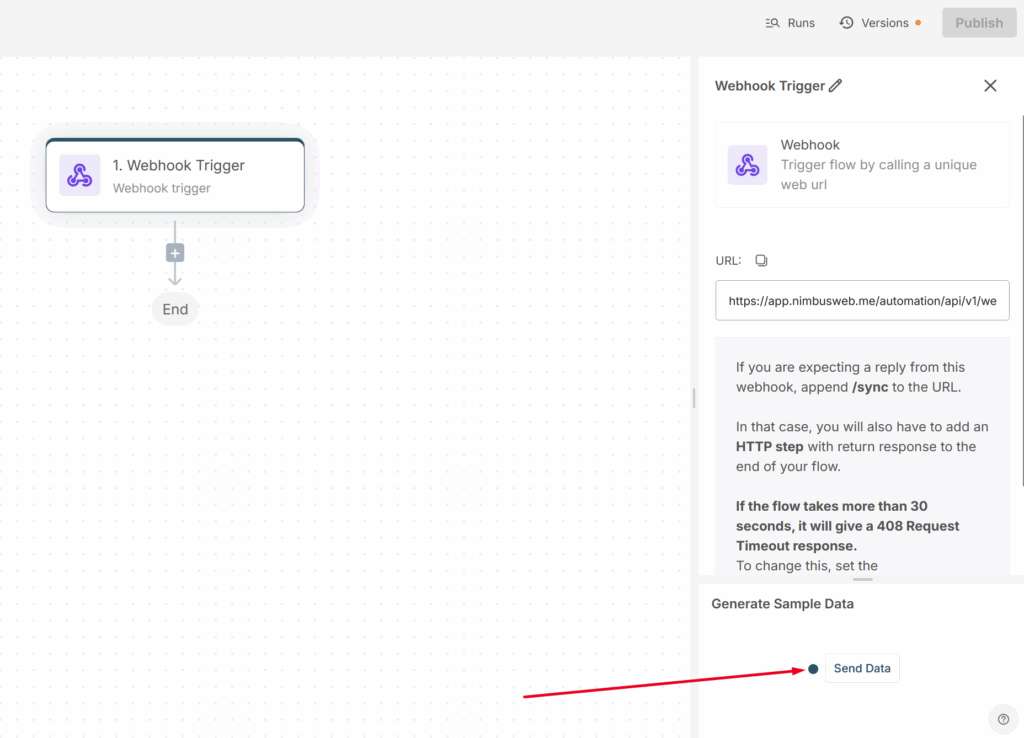
Send Data
After you have configured sending to the webhook, make sure to test data reception using Send Data. This information will be necessary for setting up the next steps.