Why do you need Custom views? Let’s say you need the ability to build a dashboard for a specific case. For example, where you only see clients from a certain portal, or where there is a specific set of fields. Of course, you can do this through the main dashboard, but:
- if many people work in the company, the dashboard will keep getting reset
- if I use the dashboard for different cases, I’ll constantly have to reconfigure it
But if there are custom views, everything becomes much simpler:
- I create a view based on the chosen dashboard (for now only a table) and name it as I like
- I configure it (filtering/sorting and hiding or showing columns)
And then I work with this view without touching the main dashboard. And I can create as many views as I (or anyone else) need.
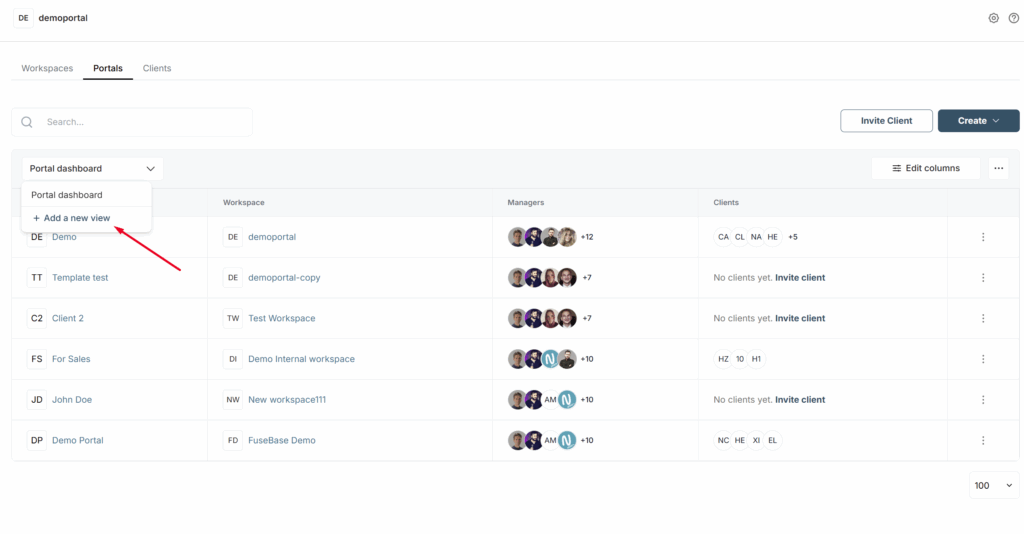
How to add a new custom view? #
1) Go to the desired dashboard (for example, Portals).
2) Click on the Custom views option.

3) Click on Add new view.
4) Next, specify the name of your new view and a description, if needed.
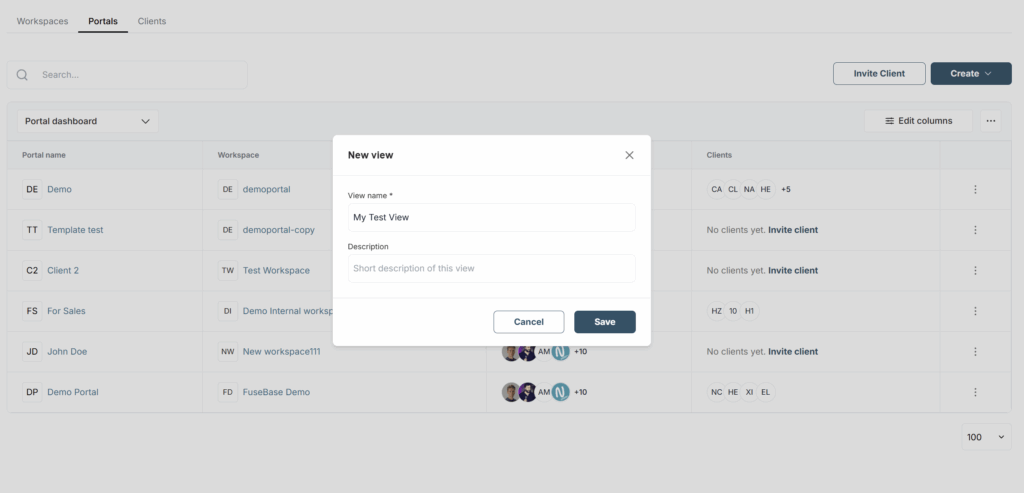
Next, you can customize your custom view as you like:
- add fields or hide unnecessary ones
- change sorting and filtering
It’s important to note that these changes will not affect other views or the main dashboard.
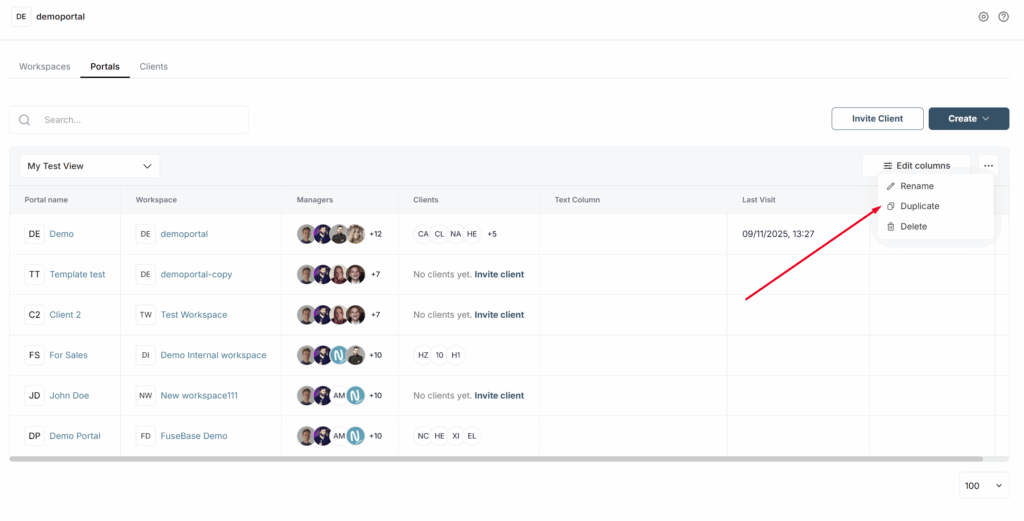
Editing a custom view #
Click on the 3-dot menu to open the menu of the current custom view. Here you can:
- Rename the view
- Duplicate it and create a new view based on the current one
- Delete the view (except for the default view)