In Fusebase, you can not only use dashboards for your internal CRM, but also create your own databases with tables. These can be used for internal operations as well as embedded into the portal to display information to clients.
Databases Section #
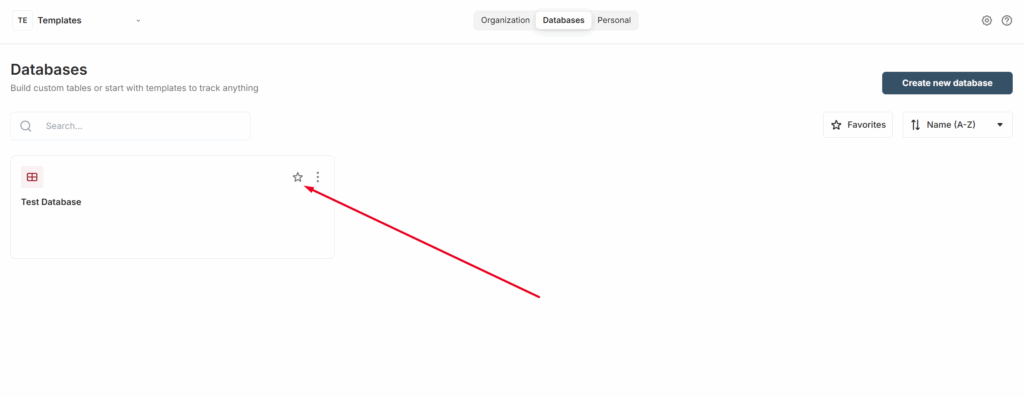
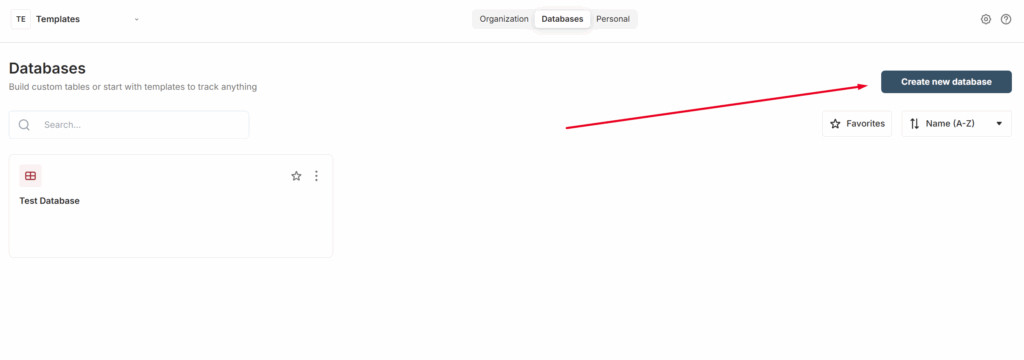
You can create and view your databases through the Databases section, which can be accessed via the navbar.
Here, you will see a list of all databases created within your organization. Please note that all organization members, except clients, have access to this section.
Adding to Favorites and Editing a Database #
If you have many databases, you can add specific databases to Favorites by clicking the star icon. This will allow you to quickly access them through the Favorites section. Clicking the star again will remove the database from Favorites.
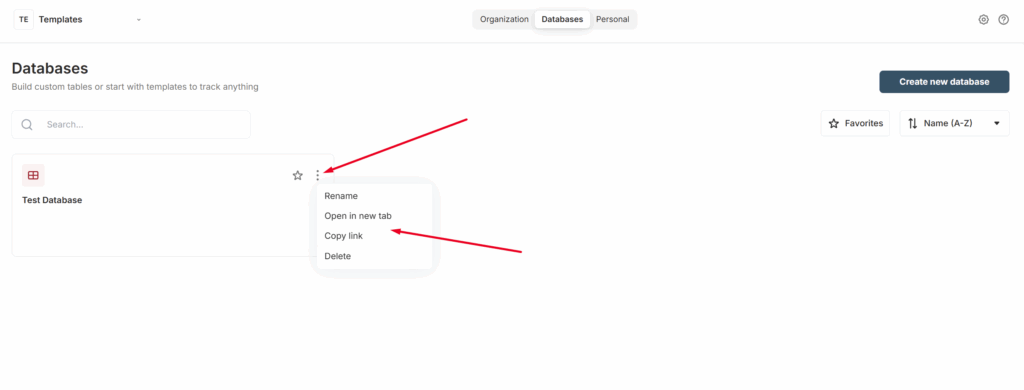
Each database also has its own menu, which you can open by clicking the three dots. Here you can:
- Rename the database
- Get a link to the database
- Delete the database along with all its contents
Database structure in Fusebase #
Let’s start with the structure of databases. Each database is a container that consists of tables. For example, you can create a database for your company’s employees, where each table represents a department — for instance, Sales, HR, Finance, Legal, IT, etc.
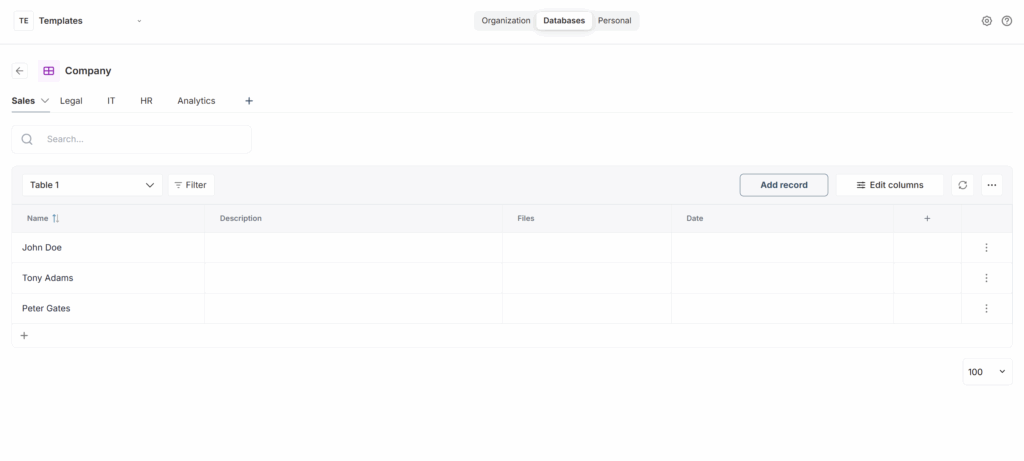
A table consists of columns and rows. If we take the employee example, each row represents an employee of the company, and the columns are attributes or data about the employee — for example, their age, salary, list of documents, date of the last vacation, and so on.
For each table, you can also add separate views where you can display, for example, filtered data based on various criteria – such as salary, employee responsibilities, and so on.
You can read more about custom views here – https://thefusebase.com/guides/dashboard-crm/custom-views-building-a-dashboard-for-ourselves/
Creating a Database #
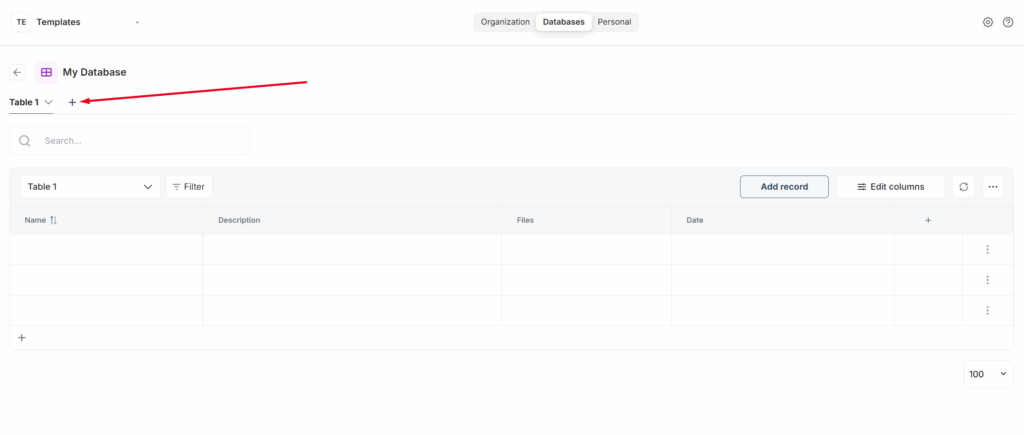
Click on „Create new database“ to create a new database. Each database consists of tables, and you can create as many tables as you need within a single database.
By default, the first table is created automatically, and clicking the „+“ button allows you to add a new table with your chosen name.
Adding and Editing Data in a Table #
Adding and editing data in a table works similarly to how it is done in our dashboards. You can find more detailed information here:
- Managing Columns: https://thefusebase.com/guides/settings/custom-fields-in-the-dashboard-building-your-own-crm-in-fusebase/
- Custom Views: https://thefusebase.com/guides/dashboard-crm/custom-views-building-a-dashboard-for-ourselves/
- Filtering and Sorting: https://thefusebase.com/guides/dashboard-crm/filtering-and-sorting-quick-guide/
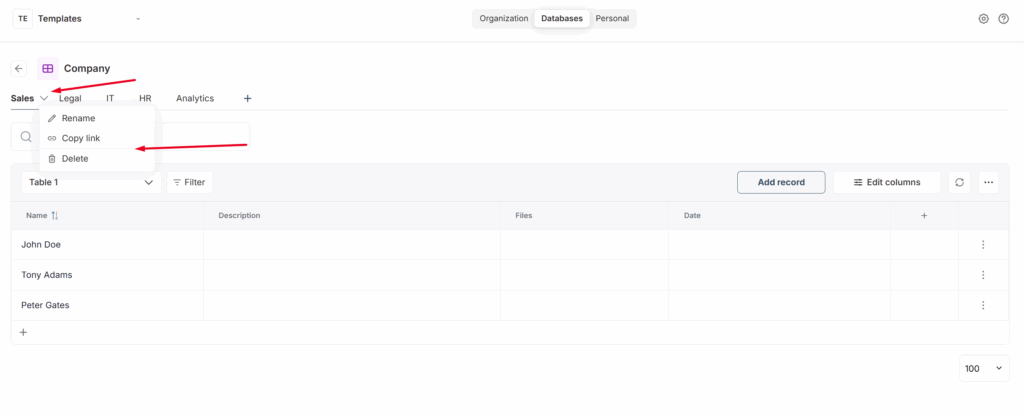
Deleting a Table and Editing Its Name #
Each table has its own menu, which you can open by clicking the arrow. Here you can:
- Delete the table along with its data
- Rename the table
- Copy the link to the table